Showing posts with label Perfect Polka Dots. Show all posts

Friday, July 20, 2012

JAI 127 Just add a colour combo


Hello there,
well this week at Just Add Ink we have a challenge with a choice for you!  We want you to add Black and White and one other colour of your choice - sounds fun eh?
I seem to be turning a lot to black, red and white (or vanilla) as a favoured colour combination - but then it is one that's hard to go past, as it has such an elegant feel. In this particular instance my red was Riding Hood Red pulled from the Twitterpated DSP. So here is what I came up with - a new card fold for me - a bit fiddly but the end result is pretty special! Here it is.

Opening up

The inside
I saw this type of card demoed at our recent convention (by Pam Morgan, SU home office) and was intrigued by the idea of using my framelits in a different way. My initial investigations informed me that I was actually going to need three pieces, two with the edges shaped by the framelit and the last that forms the base. (I discovered even a 12" long piece of cardstock is not long enough to get a full length card base and then the overlap to close.) So having worked that all out I started cutting out layers, edges and framelit layers for the focal point. Next was to sponge around all the edges to add some vintagey depth and I also used markers to ink up the large blossom branch to stamp the inside. Then time to assemble it all. The only tricky bit here is to plan where you want the two fasteners to be. Then I made sure that the brad prongs and fastening twine were all secured between the DSP and cardstock mats so that the final finish is clean.

The outcome is pretty special, and very fun to open but tricky to photograph ;)

Thanks for visiting,
Kim

Recipe: All SU! unless otherwise noted
Stamps: Apothecary Art, Elements of Style
Cardstock: Basic Black, Whisper White, Riding Hood Red
Ink: Basic Black, Riding Hood Red, just a smidge of Crumb Cake
Accessories: Labels Collection Framelits, Perfect Polka Dots embossing folder, Twitterpated DSP, Vintage brads, Victoria lace, Cherry Cobler seam binding, Cherry Cobler twine, Double sided tape, SNAIL adhesive, Dimensionals

Friday, February 10, 2012

JAI 104 - Just add Back to School

Hello there,
well this week at Just Add Ink we have a fun time of year challenge - it's Just Add Back to School - so set your imagination running and see what creative ideas you can come up with that fit a back to school theme! Go check out the rest of the DT for some fabulous ideas too! Since my lovely Miss 7 began the process of learning to read last year (I was so proud of the progress she made!!) I thought I might make up some bright fun little lunchbox notes that can get tucked in with her vegemite sandwich - well the same lunchbox anyway ;) The idea doesn't originate with me I'm pretty sure I saw the idea during a PTI release. So here they are. First the notes all bar one wrapped up ready to be tucked ;)

And here's a shot of all the notes open
And you didn't think I was going to forget my Mr almost 4 did you?? Here's a little stack for him too, so when his big sister gets one he can too :)
First I picked out my colours - pink, yellow and purple for Miss (her favourite colours) and orange, brown and blue for my little Mr. Then die cut the note bases and embossed them, all but the little flap. Next I picked out the images I wanted to use for each munchkin. Stamped these and then coloured them. Added a sentiment - some were handwritten some were a combination of stamped and handwritten, some just stamped. Punched out the image/sentiment and mounted on top of decorative mat. Then mounted that on the centre panel of the die cut. The flaps all fold together. I just tied a ribbon around each one as I knew Miss 7 would love that extra touch.

To be honest my aim was to keep these fun, colourful and simple - cause there is not a great chance that Miss 7's will a) make it home or b) make it home not smeared with vegemite!!

Thanks for visiting,
Kim

Recipe: All SU! unless otherwise noted
Stamps: Tiny Treats Valentine and Tiny Treats Birthday (PaperTrey Inc)
Cardstock: Retired SU! (Summer Sun, Only Orange, Pixie Pink, Lavender Lace, Ballet Blue, Creamy Caramel, Gable Green, Going Grey), Real Red, Chocolate Chip, X Press Blending cardstock
Ink: Memento Tuxedo Black
Accessories: Lunchbox note die (PTI), Limitless layers 1.75" circles (PTI), 1 3/4" circle punch, Perfect Polka Dots and Petals a Plenty embossing folders, Large dot embossing folder (Quickkutz), Stars embossing folder (Cuttlebug), Copic markers (a whole bunch sorry I didn't write them all down), assorted 1/8" ribbon (local craft shop), Dimensionals

Friday, February 3, 2012

JAI 103 - Just a colour combo

Hello there :)
this week at Just Add Ink we have a colour combo challenge, with a very Valentine/ love feel to it. Here's the combo.
And here is the card I made for my Mum and Dad to celebrate their 55th wedding anniversary.


I had this idea in mind for my parents card for a while, and while December is not exactly tulip time I couldn't go past colouring up a beautiful bunch of red tulips. My Dad usually buys Mum a large bunch of flowers - often red roses so I figured this fit right in with the anniversary vibe.

The flowers were hopefully going to be the stars of the card so I kept the rest of the background fairly simple - some spotty DSP, white embossed dots, seam binding where the two join and then simple stitched frame detailing. I stamped the jar direct onto the large diecut, and then added the flowers and coloured them in. I also stamped the flowers a second time and then coloured the flowers. This second image was trimmed out and then mounted on top of the base image on dimensionals. The frilly jar embellishment diecut hides where the mounted coloured layer transitions to colouring on the base layer. The card was finished off with a little framed sentiment and just a touch of bling to carry through the red and white theme.

I can't deny that the colouring took quite a while but it is a very enjoyable thing to do (even when you do it three times over!!). But I was very happy with how the card turned out and of course more importantly so were my Mum and Dad!! Hope you find the time to add some red and white this week too :)

Thanks for visiting,
Kim

PS: I know I know red and white - but really could you have coloured the leaves any colour but green!!! It just wouldn't have looked right ;)

Recipe: All SU! unless otherwise noted
Stamps: Friendship Jar, Friendship Jar Spring Fillers (PaperTrey Inc)
Cardstock: Whisper White, Real Red
Accessories: Perfect Polka Dot embossing folder, Mega Mat Stack 3 die (PaperTrey Inc), Jar Toppers and Jar Label dies (PTI), Scallop border punch, Beautiful Blooms DSP (PTI), Cherry Cobler seam binding, Copics (R20, R22, R24, R27, YG93, YG95, YG97, BG0000), sewing machine, Red rhinestones (Kaiser), Double sided tape, SNAIL adhesive, Dimensionals.

Friday, April 15, 2011

JAI 64 - just add using a chocolate bar to inspire you

I love chocolate, I really. love. chocolate! Have I got your attention ;) Well if you do too then Just Add Ink has a special challenge for you this week. We want you to pick your favourite chocolate bar and pull the colour combo from the wrapper and use it to create your challenge entry. For me it was a toss up between Lindt balls (love the way they just melt in your mouth - ahhhh) or Cadbury's Old Jamaica Rum and Raisin (my mouth is watering just at the thought!!). I just wasn't in a blue/silver/white mood so I went with the dark delectable yumminess of the Rum and Raisin. Here's a pic of what the packaging for it looks like. And here is what I created. The main colours seemed to be a dark brown, a rich yellow and a strong purple. So I translated that into Early Expresso, More Mustard and Elegant Eggplant. Having got my hands on the new Eat Chocolate set - well I just had to use it (oh and I might add there are some elements of a sneak peek for one of my convention swaps in here too!). So I started with a Early Expresso base, then added a white mat, and an embossed Elegant Eggplant top layer. Over that I added a Top Note die cut which I stamped to create a text style background DSP in More Mustard. Next for the focal element I used markers to ink up the three little chocolates and their frame, then punched it out with the decorative label punch (gorgeous!!). I punched an extra Expresso die cut to frame the inked one. Finally the finishing touches - a rhinestone, some luscious satin Early Expresso ribbon and a More Mustard button! So there you have it a rich dark card reflecting a dark rich chocolate - yum!


Thanks for visiting and have some fun turning your favourite chocolate colour combo into a papercraft creation :) Kim


Recipe: All SU! unless otherwise noted


Stamps: Eat Chocolate Cardstock: Early Expresso, Elegant Eggplant, Whisper White

Ink: Elegant Eggplant, More Mustard, Early Expresso

Accessories: Top Note die, Perfect Polka Dots embossing folder, Decorative Label punch, Early Expresso satin ribbon, More Mustard button (R), Jewels - rhinestone, Dimensionals, Double sided tape (X Press), SNAIL adhesive

Monday, April 4, 2011

Inkspirations 64


Hi there,

between a hefty household dose of germs and just being plain busy I haven't had the chance to play along with an Inkpsiration challenge for a few weeks - but an idea struck me after I saw the colour combo this week and so I decided to make the time! The colour combo is just perfect for the lovely Autumn weather we are having right now. Here it is. Aside from Autumn I thought the colours made me think lion - Rrrrrrrrr :) So I pulled out Fox and Friends and set about making a birthday for a little boy.
I settled on a Cajun Craze base, then a More Mustard layer, the next layer was split, embossed Whisper White at the top and Cajun DSP for the bottom with some Poppy Parade ribbon to cover the merge. For the main panel I stamped three lions, one in each colour as well as some spares that I then used to trim out manes and faces from so I could layer them over the base lions with dimensionals. I matted the lion panel and added some buttons to the top left corner, and used a round Happy Birthday sentiment on the bottom right. Then right at the end, once everything was stuck together I added the piercing frame around the main panel - sometimes you just know you need to add something!


I think the colours work well but my only reservation is that the birthday sentiment is too big and overpowers the lions a bit. Ah well I suspect little boys aren't quite as critical as me ;) The inside was finished off to match with another lion.


Thanks for visiting,

Kim


Recipe: All SU! unless otherwise noted

Stamps: Fox and Friends, Party Hearty, Think Happy Thoughts (R)

Cardstock: Cajun Craze, More Mustard, Whisper White

Ink: Cajun Craze, More Mustard, Poppy Parade

Accessories: Regals DSP pattern stack, Regals buttons, Pure Poppy button (PaperTrey Inc), Poppy Parade ribbon, 3/4", 1 1/4" and 1 3/8" circle punches, Perfect Polka Dots embossing folder, Dimensionals, Double sided tape (X Press)

Friday, October 1, 2010

JAI 37 just add a colour combo


Hi there,

this week Just Add Ink has a lovely colour combo to work with. It's my week off from the DT but I always try to play along if I can. Here's the colour combo.

I was struggling with a nasty cold when I was trying to think up ideas for this challenge and it really was a struggle. The combo said flowers to me but could any ideas penetrate the fog in my head - nope :( So I turned to a great standby to CASE someone else's work. I saw a card on p102 of the new USA SU! catalogue and I knew instantly that it would be perfect. So here is what I came up with.


The layout and layering of the flowers is pretty much identical to the catty card. The one touch that I added was to emboss the card base with the Perfect Polka Dot folder. So starting from the begining ;) I embossed the base layer with Perfect Polka Dots. Then add a panel of Rose Red scalloped down the LHS. Another layer of Whisper White was added on top of that. On this layer I stamped the flower stems in Always Artichoke (having worked out the placement of the flower heads). The leaves were stamped in Old Olive trimmed out and fixed into place (two are up on dimensionals). I used Petals Pizzazz for the flowers in a mix of Pumpkin Pie and Rose Red, also using some DSP for each colour. I layered the flowers up, added the finishing touches - felt fusion flower and rhinestones. Then glittered up the Rose Red layers. All I needed to do then was add the sentiment embellished with some white taffeta and another rhinestone brad. The inside was finished off very simply to match.

I really like how bright and cheery this turned out!

Thanks for visiting - and if you have time this week why don't you play along with the challenge and link your creation back to Just Add Ink.

Kim

Recipe: All SU! unless otherwise noted
Stamps: Petals Pizzazz, Party This Way
Cardstock: Whisper White, Rose Red
Ink: Rose Red, Pumpkin Pie, Old Olive, Always Artichoke
Accessories: Perfect Polka Dots embossing folder, Scallop border punch, 1 3/4" circle punch, Felt Fusion (R), Rhinestone brads(Clear and Fire), White Taffeta ribbon, Always Artichoke narrow grosgrain ribbon, Old Olive brad, Two way Glue, Dazzling Diamonds, SNAIL adhesive, Double sided tape, Dimensionals

Tuesday, September 7, 2010

Inkspiration 37- Pennant Party


Hi everyone,

well I'm back for the Inkspiration challenge this week, after having last week off to visit my new little niece - its so easy to forget how tiny they are when their born - especially when you have two kids, now 2.5 and 5.5 years running around! So this week its not going to be a baby card ;) This week Keesh has picked out a nice combo of colours (see below) so instead I opted for boys birthday card (of the grown up type) since quite a few of the men in my family have birthdays coming up.

And here is what I came up with. I finally succumbed to the banner/pennant trend and I must admit it does give a fun look :)


I started with a Whisper White base, layered that with a Chocolate Chip and then added a top Whisper White layer embossed with the Perfect Polka Dots embossing folder. Across the top left corner I added a little string of three flags strung together with linen thread and mounted on dimensionals. For the central panel I started with a Choc Chip base cut with a scalloped rectangle nestability. I layered that with Whisper White. In the bottom left corner I stamped B is for birthday. Different bits inked up in the different colours and the central star is up on a dimensional. I finished off the top panel with a string of 5 flags in alternating colours, across the top right corner, again strung together with linen thread. This top panel was mounted over a strip of the (now retired) 1" Choc Chip grosgrain. I finished the inside off with another string of flags.

Thanks for visiting,

Kim

Recipe: All SU!
Stamps: Party Hearty
Cardstock: Whisper White, Chocolate Chip
Ink: Ruby Red, Old Olive, Baja Breeze, Chocolate Chip
Accessories: Perfect Polka Dots embossing folder, 1" Double stitched Chocolate Chip grosgrain ribbon, Old Olive brad, Linen Tread, Mat pack and piercing tool, Double sided tape, Dimensionals

Friday, July 23, 2010

Just Add Ink 27 - Cupcakes


Hi everyone,
yep I've been a busy girl but I couldn't resist playing along with the sketch challenge this week from Just Add Ink. Here's the sketch

I'm still on a birthday card roll - so the first thing that came to mind was cupcakes, as I know that my Mr 2 and Miss 5 both think they are good! So here is the result.


Being intended for a 4-5 year old girl I had to put pink in there and so I went with one of my favourite colour combos - Regal Rose and Close to Cocoa (so so sooo sad that this is retiring). I decided to tranisition my cupcakes from all Regal Rose to all Cocoa, with two mixed ones in between. A little something was added to each cupcake - candle, birthday number or just lots of crystal effects and dazzling diamonds. Since I wanted the cupcakes to take the stage I kept the background pretty simple - white embossed with the Perfect Polka Dot folder. But I added a bit of extra texture by sewing pink zig zag all around the edges - my first time trying zig zag - and oh my I do like it :) I just ran a strip of Regal Rose grosgrain under the cupcakes (which were mounted up on dimensionals) and finished it off with a large rhinestone brad. I decided to leave the sentiment off as I felt it would have cluttered the front up too much and there are enough clues that let you know what the card is intended for ;)The inside was finished off to match. This one did get the thumbs up from my Miss 5 - yeh!


Its a great sketch so why don't you pop over to Just Add Ink and join in the fun!


Thanks for visiting,
Kim

Recipe: All SU! unless otherwise noted
Stamps: Party Hearty
Cardstock: Regal Rose, Close to Cocoa, Whisper White
Ink: Regal Rose, Close to Cocoa
Accessories: Perfect Polka Dots embossing folder, Timeless Type alphabet Sizzlets,Regal Rose wide grosgrain ribbon, Fire Rhinestone, sewing machine, Crystal effects, Dazzling Diamonds, SNAIL adhesive, Double sided tape, Dimensionals

Tuesday, June 8, 2010

Choo Choo Colour Challenge


Hi all,

welcome back for this weeks first installment. Yep don't forget to check back in Friday PM when I post my guest design team card for Makeesha Byl's next challenge. But right now lets get on to today. Keesh's challenge this week was a colour challenge here the coloiur palette:


With my Miss 5 at (pre) school this year her potential to attend birthday parties is expanding and so I am working on building up a stash of birthday cards - so I hopefully won't be rushing at the last minute trying to throw something together - or gasp ;) buying one! So expect lots of birthdays till the christmas card push begins anyway lol!

So birthday card + boy somehow came together to this end (the idea somehow popped into my head as I was cuddling Mr 2 pre bed)

And the inside finished off to match the front.

I started by cutting an A frame Kraft base, then matted that with Real Red and Whisper White, polka dot embossed but turned to the debossed side. Next I cut a square Kraft panel and four squares - two Red and two Basic Grey - to layer over it. Now comes the stamping ;) - using Versamark I stamped my Choo Choo engine on Real Red, Basic Grey and Kraft and then embossed with white. Using the 1 3/8" circle punch I punched out an engine from each, slightly changing the engine placement on each. For the final panel it was either put a number (but I don't have the Big Shot alphabet dies - (yet) or a birthday sentiment. The good thing about using the sentiment was that it means I can use it for a 4 or 5 or even 6 year old - keeps my options open! So I stamped and embossed the sentiment, then as the finishing touch for that I added a row of piercing above and below. All the circles were then adhered onto a square, mounted up on dimensionals. The square Kraft panel was then mounted up on dimensionals over a strip of Real Red polka dot ribbon (turned plain side up) - and thats it. Well except for finishing the inside.

I have to admit to being happy with how this turned out - clean, stylish, great for a boy with some texture from the (de)bossing and shine from the heat embossing. It's nice when an idea comes together :) !

Thanks so much for visiting :) Don't forget to pop back later this week.

Kim

Recipe: All SU! unless otherwise noted
Stamps: Choo Choo (R), A Little Birthday Cheer
Cardstock: Kraft, Real Red, Whisper White, Basic Grey
Ink: Versamark, Basic Grey
Accessories: Perfect Polka Dots embossing folder, 1 3/8" circle punch, white embossing powder, Real Red stitched polka dot grosgrain ribbon, Mat pack and piercing tool, Dimensionals, Double sided tape
.


Tuesday, June 1, 2010

Convention Swaps

Hi all,

yep back again. Just a little late in getting my post convention post up!!

Wow well what an experience, I have got to say my first impression was of being overwhelmed - so many excited women talking and swapping. I recognised some and got to meet some special people - waving hi to Linda (you won't have realised but you got my first swap ever - and yours was my first swap!!) , Sarah Jane and Kirsty. It blew me away that a few people recognised me!!(Hi Natasha - thanks for saying hi :) Overwhelming as I said but really nice.

Before I go any further I want to say hello to some lovely ladies I got to meet and spend time with at Convention. First my sideline Krysta - it was really fun to share this experience with you.


Then some friends of a dear friend who gladly adopted Krysta and I - waving a big hi to Di, Leanne, Kelly, Cathy and Anamaria. Here's a picture of us with Shelli. Yep I'm in a picture with Shelli - it just spins me out saying that - its so surreal.


Finally I also want to send out a hello to Sharnee and Carli these two were real fun to share a table with for the make and take session - even sleep deprived (- I'm sure you've read the two time fire alarm story on lots of blogs).

Thanks to the above ladies (to me the most important thing about convention is the people - I loved all the creative ideas, general sessions, memento hall, the dinner and awards (the Fijian dance troupe was amazing!!) I had a wonderful first convention experience and am looking forward to going to Melbourne in 2011 to catch up with "old" friends and meet some of the other talented people I only glimpsed this time.

Now, finally, if you have managed to hang on through all of the above here are my swaps.


Little Leaves


Vintage Vogue
Fox and Friends

Manhattan Rose


Sorry about the peg being in the pic's but it was the only way to get the swaps to stand up right as they are only card front ;)

Thanks for visiting,

Kim

Recipes
Little Leaves
Stamps: Teeny Tiny Sentiments
Ink: Close to Cocoa
Cardstock: Whisper White, Close to Cocoa, Kiwi Kiss (textured)
Accessories: .Little Leaves die, Medium Jewellery Tag Punch, Perfect Polka Dots embossing folder, Soft Suede Polka Dot grosgrain ribbon, Linen Thread

Fox and Friends
Stamps: Fox and Friends, Polka Dot, Short and Sweet
Ink: Tangerine Tango, Pacific Point
Cardstock: Whisper White, Tangerine Tango, Pacific Point
Accessories: Corner rounder, Tangerine Tango Striped grosgrain ribbon, Dimensionals

Vintage Vogue
Stamps: Vintage Vogue, Very Vintage
Ink: Basic Black, Sahara Sand, Versamark
Cardstock: Whisper White, Basic Black, Sahara Sand
Accessories: .Bella Bleu DSP, White Embossing Powder, Black Brad, Eyelet border punch, Sponge dauber, distressing tool (Cutter Kit), Dimensionals, Black Sewing Thread

Manhattan Rose
Stamps: Best Yet
Ink: Real Red
Cardstock: Whisper White, Real Red, Night of Navy
Accessories: .Washington Apple DSP, Manhattan Flower Embossing folder, Punches (Scalloped Oval, Large Oval, Corner rounder, 1/8” circle), Mat pack and piercing tool, Real Red wide grosgrain ribbon

Monday, May 17, 2010

A Little Something

Hi all,

sorry for the absence lately - I've been busy, busy, busy.

Busy at home (almost finished my swaps for convention - two more sleeps till I head off to Sydney - yahooo :), busy at work, and on top of that sick as well. Not alot of fun when your busy :( But feeling much better now....

Since I won't be posting a challenge card again this week, I dug a little something out of my archives. I made some bookmarks to go with family Christmas presents last year, using the template in the SU! demo magazine late last year. They slip over the corner of the page you are up to. My apologies for the crappy photos but I took them late at night just before I was going to wrap up the presents.


The scallop trim you see on all the book marks is actually made by punching out scalloped squares, tucking them into an internal layer, making sure they are level and overlapping.

Finally I want to finish by posting some blog awards I received recently. First the Sunshine award from the lovely Susan Hogan - thanks for your kind words Susan :)


The beautiful blogger comes from the lovely and talented Gardenia Pepworth - thanks so much :)


For the award I have to tell you 10 things about me
1. I love dark chocolate
2. I was really proud of myself yesterday for hemming two pairs of pants, since I've been using my sewing machine recently on cards I figure I should also use it for its intended purpose ;)
3.I have a chocolate Burmese cat who snuggles into bed with me every night.
4.My favourite colours are blue and green
5. I love reading fantasy/sci fi and will read the same book again and again. I've just started on my Terry Pratchetts again.
6. I started going to the gym this year, and despite regular chocolate intake ;) have lost 5-6 kilos so far - very happy about this!
7. I'm going to my first SU! convention in 3 days and am very excited about meeting so many of the creative people I've met through my blog.
8. I've almost finished knitting a jumper for my wonderful Miss 5, that was another project put on hold while I was making swaps.
9. I had to get my first pair of glasses this year
10. Lastly but most important I have wondeful family and home - my handsome hubby, a gorgeous Mr 2 and beautiful Miss 5 and my wonderful parents as well. Dad is even picking me up from the bus when I arrive in Sydney for convention!

Wheww that was hard. Ok there are some really talented lovely people I would like to pass the awards on to.
Kate Lewis
Liam Pucher
Since Gardenia Pepworth sent me the Beautiful Blogger I can't pass it back but I can send on the Sunshine Award with thanks!
Thanks ladies for the inspiration and thanks to all my visitors I'll look forward to getting back to the regular programing ;) so to speak once Convention is over.
Bye...
Kim

Tuesday, April 20, 2010

Four

Hi there again,

yep I'm back again with my regularly scheduled post for Makeesha Byl's challenge. Its been quite fun this week to do two versions of the sketch Keesh set for the challenge this week. They are sooo different! If you want to see the first version just click here. So first up here is the sketch.

I started with the idea of making a birthday card for a boy (turning four - hopefully thats obvious;). I decided to try using the three primary colours so brace yourself this is BRIGHT.


I told you...

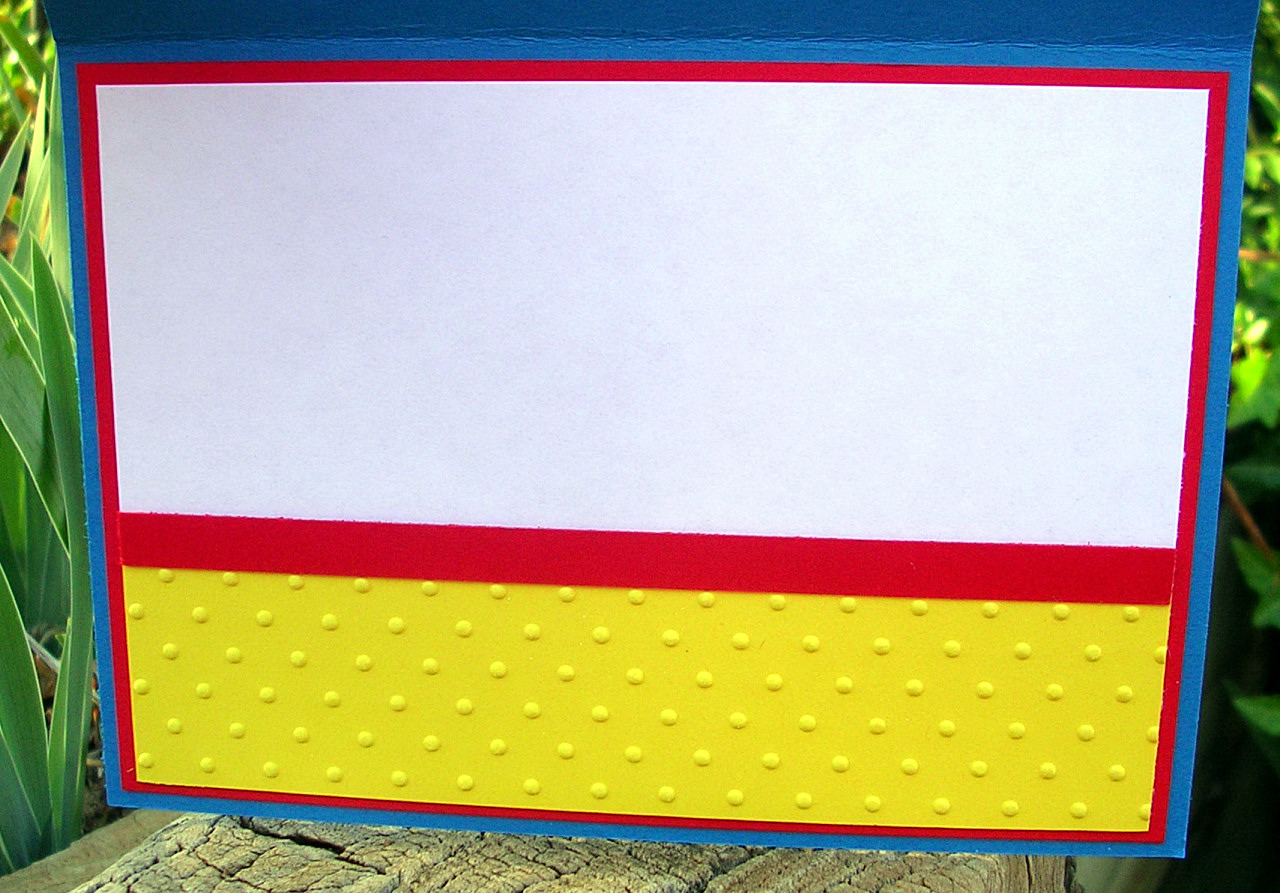
I started with a Pacific Point base, layered that with a Real Red, then split the top layer between Whisper white rolled with Yoyo Yellow using Builder Bits (great wheel but long retired). The bottom half is pure Yoyo Yellow but embossed this time with the Perfect Polka Dots embossing folder. To follow the sketch (and hide the join) I added a strip of Real Red layered with some Pacific Point ribbon. For the main panel I used a very cute robot stamp I have. I stamped him three times, first in Pacific Point, which I used as the base, then in Real Red and Yoyo Yellow. To the Pacific Point base I added a Red tummy and Yellow hands and feet, all mounted on dimensionals. To finish him off I added a little red party hat and silver brads for eyes. Then I mounted him onto a scalloped Real Red rectangle. For the sentiment I stamped out four in Versamark and embossed with White, adding a blue star and silver brad to accent it, then tucked it into the ribbon band. The final touch are three little stamped red "screwheads" mounted up on dimensionals.

Thanks for visiting (again) this week,

Kim

Recipe: All SU! unless otherwise noted
Stamps: Builder Bits (R), Straight Up Alphabet and Numbers (R), Space ships and Robots (My Cute Stamps)
Cardstock: Pacific Point, Real Red, Yoyo Yellow, Whisper White
Ink: Pacific Point, Real Red, Yoyo Yellow, Versamark
Accessories: Perfect Polka Dots embossing folder, Rectangle nestabilities (Spellbinder), Small Star punch, 1/4 inch circle punch, White embossing powder, Pacific Point striped grosgrain ribbon, Silver brads, Dimensionals, SNAIL adhesive, Double sided tape