Showing posts with label Elements of Style. Show all posts

Friday, May 3, 2013

JAI 164 Just add a sketch

Hello there,
well after a bit of a break (in Hawaii no less) its back to catching up with my design team challenges. I enjoyed the change of pace but it was nice to come home and get inky again :) I've also been delving into SU! My Digital Studio - what a learning curve! But I really love the possibilities it offers. May'be I'll even get to put together a photo book on the holiday!

Anyway onto this weeks Just Add Ink challenge. This week we want you to add a sketch. 
This how mine worked out.

May'be the warm weather in Hawaii inspired the springy feel of todays offering! In a bit of a doh momment I only realised as I was overlaying the trimmed out elements that of course they wouldn't overlay perfectly as I'd cut the bottom coloured panel up and spaced it out as a grid. To minimise this I had to cut the two larger sprays into much smaller pieces. I also wanted to leave some of the grid visible so you can see designs origin from the sketch. I used the ink pad lids and my aquapainter for all the colouring. 

I wanted something special for my Mum's birthday and I think this fits the bill. Even if outside the window we have a carpet of colourful autumn leaves on the ground!

Thanks for visiting,
Kim

Recipe: All SU! unless otherwise noted
Stamps: Elements of Style, Everything Eleanor, Layered Labels, Vintage Labels (R)
Cardstock: Riding Hood Red, Baja Breeze, Whisper White
Ink: Riding Hood Red, Baja Breeze, So Saffron, Basic Black
Accessories: Large oval and scalloped oval punches, Subtles Designer Series paper stack, Aqua painter, Jewels - rhinestones, Dazzling Diamonds, Two way glue pen, Dimensionals, Double sided tape (X Press)

Friday, October 26, 2012

JAI 141 Just add a colour combo

 Hello there,
well this week at Just Add Ink we have a colour challenge for you and it has a lovely soft feel just perfect for vintage girly stuff! Since I needed a birthday card for a friend it was well timed for me :) Here are the colours.
 And here is what I came up with - a mix of old and new!

Lots of layering of embossing and ink , it was fun to just play around and see how it turned out. Luckily for me it looked good ;) To soften the flowers, once I stamped them I just grabbed my aquapainter and lightly spread the ink from the stamped image. The rest is pretty straightforward, some sponging and lots of embellishing details to give that vintagey feel. It's fun to create a full on girly card sometimes :) Now that's not to say these colours have to vintage! Why don't you join us at Just Add Ink this week and see what you come up with.

Thanks for visiting,
Kim

Recipe: All SU! unless otherwise indicated
Stamps: Elements of Style, Tiny Tags
Cardstock: Very Vanilla, Crumb Cake, Winter Wisteria
Ink: Winter Wisteria, Crumb Cake
Accessories: Vintage Wallpaper embossing folder, Stripes embossing folder, Classic Oval nestabilities (Spellbinder), Finishing touch edgelets, Medium Jewelery Tag punch, Crumb Cake seam binding, Winter Wisteria twine, Dimensionals, Double sided tape (X Press)

Friday, July 20, 2012

JAI 127 Just add a colour combo


Hello there,
well this week at Just Add Ink we have a challenge with a choice for you!  We want you to add Black and White and one other colour of your choice - sounds fun eh?
I seem to be turning a lot to black, red and white (or vanilla) as a favoured colour combination - but then it is one that's hard to go past, as it has such an elegant feel. In this particular instance my red was Riding Hood Red pulled from the Twitterpated DSP. So here is what I came up with - a new card fold for me - a bit fiddly but the end result is pretty special! Here it is.

Opening up

The inside
I saw this type of card demoed at our recent convention (by Pam Morgan, SU home office) and was intrigued by the idea of using my framelits in a different way. My initial investigations informed me that I was actually going to need three pieces, two with the edges shaped by the framelit and the last that forms the base. (I discovered even a 12" long piece of cardstock is not long enough to get a full length card base and then the overlap to close.) So having worked that all out I started cutting out layers, edges and framelit layers for the focal point. Next was to sponge around all the edges to add some vintagey depth and I also used markers to ink up the large blossom branch to stamp the inside. Then time to assemble it all. The only tricky bit here is to plan where you want the two fasteners to be. Then I made sure that the brad prongs and fastening twine were all secured between the DSP and cardstock mats so that the final finish is clean.

The outcome is pretty special, and very fun to open but tricky to photograph ;)

Thanks for visiting,
Kim

Recipe: All SU! unless otherwise noted
Stamps: Apothecary Art, Elements of Style
Cardstock: Basic Black, Whisper White, Riding Hood Red
Ink: Basic Black, Riding Hood Red, just a smidge of Crumb Cake
Accessories: Labels Collection Framelits, Perfect Polka Dots embossing folder, Twitterpated DSP, Vintage brads, Victoria lace, Cherry Cobler seam binding, Cherry Cobler twine, Double sided tape, SNAIL adhesive, Dimensionals

Friday, April 27, 2012

JAI 115 Just add a sketch

Hello there,
there has been a bit more toe dipping this week as well as some nice walks on the beach, well there was before the weather closed in! However while I've enjoyed the change it will be nice to get home. 

Now on to this weeks Just Add Ink challenge, this week we have a sketch for you. Here it is.


I knew life was going to be hectic once we got back so I prepared this one (or should I say two) ahead so I was already for Mothers Day in early May. I rotated the sketch 90 degrees and then mirror imaged it. Here's the outcome.


I started with the idea of making the flowers. I seen a few recently on the blog a lovely friend Di Barnes here. She mentioned using three layers each of fancy flower, triple doily and boho blossom punches. I used three different colours for each flower. Secured them together with a vintage brad and then liberally sprayed with platinum shimmer mist, scrunching the layers up to give the flowers shape. Then set them aside to dry. The top layer of the cards are portioned as one third DSP and one third white impressed cardstock. With the separation being covered by pleated lace (secured with sticky strip) and ribbon. The white section was also stamped with some flowering swirls, embellished with some little blossoms, that lead the eye to the sentiment. The flower was partially laid over the DSP and stamped swirls and I finished it all off with a few little leafy sprigs. To be honest I found this sketch to be another challenging one!

Thanks for visiting,
Kim

Recipe: All SU! unless otherwise noted
Stamps: Creative Elements, Elements of Style, Well Scripted (R)
Cardstock: Card 1: Riding Hood Red, Peach Parfait, Apricot Appeal (R), Baja Breeze Card 2: Elegant Eggplant, More Mustard, Perfect Plum, Garden Green, Whisper White
Ink: Peach Parfait, Riding Hood Red, Elegant Eggplant, Perfect Plum, More Mustard
Accessories:  Punches (Fancy Flower, Triple Doily, Boho Blossom, Extra large Oval, 1" circle, Itty Bitty Bits, Two step bird), Linen/Canvas Impression plate (PaperTrey Inc), Regal pattern stack DSP, Everday Enchantment DSP, Vintage brads, Elegant Eggplant scalloped dotted grosgrain, Riding Hood Red taffeta (R), Victoria lace, Jewels - pearls, Platinum shimmer paint, Sponge, Dimensionals, Sticky strip, Double sided tape

Friday, January 20, 2012

JAI 101 - just add a sketch

Hello there,
welcome back for a new Just Add Ink challenge. This week we have sketch challenge for you and here it is - a nice square one.
 I just happened to be browsing the local craft store and saw some scrapbook frames that were just perfect for making some wall art for my kids rooms and they were square - perfect. Here is what I made for my Miss.
A close up of the gold shimmer
And a close up of one of my favourite bits - I tried stamping on the frame and wrapping it around
I really started from scratch with this, as the frame was a raw pine one and I've got to say it was quite fun! So first I painted it with hot pink acrylic paint (which not surprisingly we had in the house) then once that layer had dried I coated it a couple of times with white acrylic paint. Then once that dried (being summer it didn't take all that long for each layer to dry) I sanded the frame, trying to get a gentle distressed look and also aiming to get some of the pink to show through. Once that was all done I stamped the swirl onto the frame, wrapping it around the sides. Then I sprayed the frame with gold shimmer - liberally ;) After that was all dry then sprayed the frame with sealer, and as the final touch added some rhinestones. Now for the inside. I knew I wanted a big butterfly to be centre element of the sketch and I wanted a substantial one. So I die cut a chipboard one and also one in DSP, glued them together and then embossed. I then sponged the edges of the butterfly with Pretty in Pink and just a touch of Melon Mambo to accent the edges. Made some antenna out of jewelery wire and added some buttons and then more gold shimmer for the butterfly! Underneath the butterfly I have a scalloped square of text DSP (the only bit my daughter did not like but I was equally adamant that it would stay). That was layered over more patterned DSP, I sponged the edges of both layers with PIP and MM again. Ok last thing was to add a sentiment - my little Miss and I both agreed that "follow your dreams" was a good one. Now I just need to make one for my little boyo - I thinking a space theme for his I think.

Right I was up wayyyyy too late last night so I need get to bed - and I have certainly babbled on enough ;0 so many thanks for visiting!! and if you can give the sketch a try. Oh and don't forget the JAI scrapbooking challenge that runs till the last Friday of the month.

Kim

Recipe: All SU! unless otherwise noted
Stamps: Elements of Style, Fillable Frames #3
Cardstock: Pretty in Pink, Melon Mambo, Very Vanilla
Ink: Pretty in Pink, Melon Mambo
Accessories: Beautiful Butterflies Bigz die, Scallop square duo Bigz die, Elegant Bouquet embossing folder, Flirtaceous DSP, First Edition DSP, Designer Label, Modern Label punches, 1" circle punch, Jewels - rhinestones, Gold smooch spray, chipboard, Razeberry Fizz vintage buttons (PaperTrey Inc), jewelery wire, Acrylic paint, Tombow multi, daubers, Dimensionals, Double sided tape.

Friday, June 10, 2011

JAI 71 - Just add black and white


Hello there,

well its time again for another Just Add Ink challenge - and this week we want you to just add black and white.

I made my card not long after returning from Convention in Melbourne and I definitely had a case of butterflies on the brain (largely due to the fabulous wow presentation by Kirsty Brown). So butterfly it was :)


Because of the black/white colour scheme I wanted to make sure that I added lots of texture in different ways. First up embossing. I clear embossed a swirl on the main Whisper White panel (only catch is that its darn hard to get a decent photo of it). This panel was mounted on dimensionals above the base. I also black embossed the flowering branch from Elements of Style. Then die cut a butterfly from it. Next I cut a smaller black and vellum (to tone down the black) butterflies to layer over my flower embossed one. I finished off the butterfly by adding some rhinestones and black hemp twine antennae. The butterfly was mounted on a textured scalloped black square, and all of that was mounted on dimensionals above the white embossed layer. Last touch was to wrap some black hemp twine under the butterfly panel and tie on a sentiment tag. The inside was finished with a swirl and some more butterflies.

Black and white does make for a striking combination so if you can why don't you have a go!

Thanks for visiting,
Kim

Recipe: All SU! unless otherwise noted
Stamps: Elements of Style
Cardstock: Whisper White, Basic Black, Vellum
Ink: Versamark, Basic Black
Accessories: Beautiful Butterflies BigZ die, Beautiful Wings embosslit, Scallop Square duo BigZ die, 1" circle punch, Linen and Canvas Impression plate (PaperTrey Inc), Black hemp twine (R), Jewels - rhinestones, Dimensionals, Double sided tape


Friday, May 20, 2011

JAI 68 - just add a colour combo


Hi there :)

well life is settling down into its familiar patterns after Convention. Convention was a total blast by the way - but I imagine you would have guessed that anyway - lol. I had the absolute pleasure of meeting in person alot of the Just Add Ink team (I can't even tell you how much fun that was!)
as well as some other special stamping friends, including Di Barnes,

Sharnee Torrents (Bron's in this pic too),

Linda Higgins, Kirsty Brown

and Sarah Jane Kale. Next years Convention will be on my home ground - Canberra! (only 376 days to go - but whose counting - smile)

Ok now on today's new Just Add Ink challenge - this week we have a lovely colour combo for you. Here's the colour pick.

I actually made this one a while ago as a special birthday card for one of the JAI team - she loves to add a bit of stitching to her work - so I knew I had to include some :) The combo conjured up thoughts of soft vintagey flowers to me - and I couldn't resist the chance to do colouring of the blossoms from Elements of Style.


As you can see this one has lots of layers - a Baja Breeze base, then Perfect Plum mat, then DSP, stitching around this layer, then the focal image. This starts with a Pear Pizzazz mat, then scalloped Perfect Plum layer, then a split layer of DSP and the coloured image (aquapainter with ink pad lids). To embellish that I've added a double bow of white taffeta and added two double layered tiny tags with the sentiment. The inside was decorated with another sprig of flowers to match. End result soft and sweet I think.

Thanks for visiting and if you can why don't you see what you can come up with this week and join in the challenge.

Kim

Recipe: All SU! unless otherwise noted
Stamps: Elements of Style, Tiny Tags
Cardstock: Baja Breeze, Pear Pizzazz, Perfect Plum, Whisper White
Ink: Stazon On Black, Perfect Plum, Pear Pizzazz, Daffodil Delight
Accessories: Circle Scissors Plus, Circle Nestabilities- Classic and Scalloped(Spellbinder), Parisian Breeze DSP (R), Watercolour paper, Scallop border punch,Medium Jewelery Tag punch, White Taffeta ribbon, Sewing machine, Linen Thread, Dimensionals, Double sided tape

Thursday, February 3, 2011

Just Add Ink 54 - Just add a colour combo


Hi there,

yes it’s that time of the week, time for another Just Add Ink challenge :) This week we have a colour combo for you to turn your hand to. Want to know what it is??


The colours struck me as being kind of vintagey, and since my Elements of Style set had barely seen ink I decided this was the time to have a go.


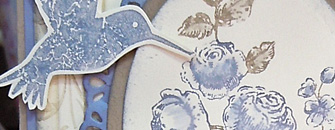
I went with a Regal Rose base to try and keep things light, then layered that with Early Expresso and then DSP (text pattern – love this!). I inked up my large flowering branch stamp first with Versamark, then with Soft Suede, stamped it on watercolour paper and embossed with clear powder, then I watercoloured it using ink pad lids and aquapainter. If the oval edges look a bit rough it’s because they are. I decided I wanted the stamp to overflow the oval so I pressed the nestie cutting edge in to make a bit of an impression and then hand cut. That was framed with Early Expresso and then a scalloped Regal Rose oval. I added a bird up the top embellished with a rhinestone, and down below the oval three layers of scalloped text DSP in Regal Rose, Rose Red and Early Expresso. Lastly I added some Early Expresso satin ribbon and two tiny tags. The inside is finished off with another embossed and coloured flowering branch.

This one kind of evolved on me but I must admit I am quite happy with the end result and with a colour combo I would not have expected to ever try or like for that matter but I do! So can you see yourself turning your hand to this one – please do and then link your creation back to Just Add Ink.

Thanks for visiting,

Kim

Recipe: All SU! unless otherwise noted
Stamps: Elements of Style, Tiny Tags
Cardstock: Regal Rose, Early Expresso, Very Vanilla
Ink: Soft Suede, Regal Rose, Rose Red, Early Expresso, Versamark
Accessories: Neutral, Subtles, and Brights DSP pattern stacks, Medium Jewelery Tag punch,Scallop border punch, Oval (Classic and scalloped) Nestabilites (Spellbinder), Early Expresso satin ribbon, Linen thread, Jewels - rhinestones, Clear embossing powder, watercolour paper, aquapainter, Dimensionals, Double sided tape, SNAIL adhesive