Friday, December 23, 2011

JAI 99 - just add wrapping/ pretty packaging

Hello,
well it's almost Christmas - yippee! The run up has been pretty crazy, but every...thing...is...done...now! even the presents wrapped - hurray. So it's time to sit back and relax (well as much as that is possible with four kids under 6 around - no not all mine!!), catch up on some blog browsing, read a book and perhaps have the odd glass of champagne too :) The challenge this week at Just Add Ink is perfectly suited to the Christmas season - it's just add wrapping/pretty packaging.


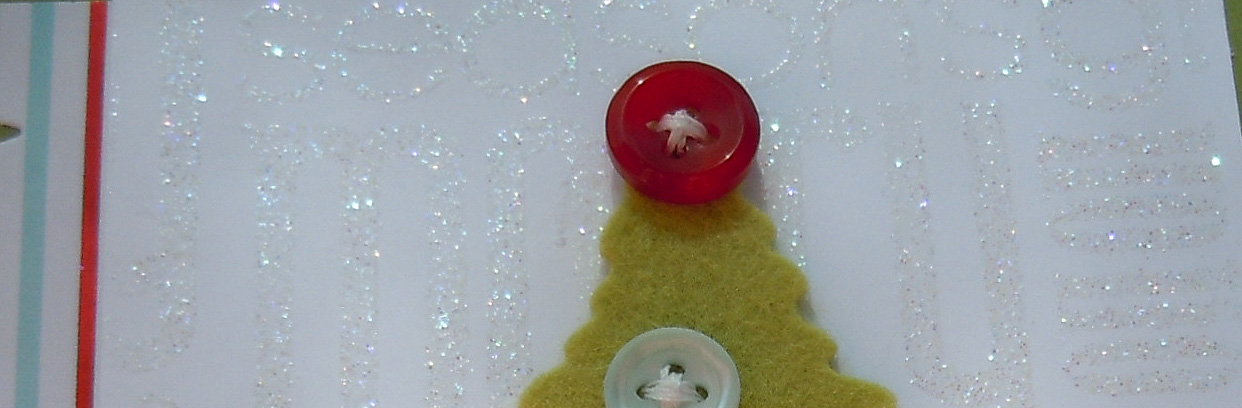
I wanted to make my SIL some lavender filled felt strawberries ( I made some of these earlier this year - see this post for the details of the making). The only thing I've improved was to add a little button to hide where the ribbon hanger is stitched on. I figured these juicy berries required some special packaging to showcase them. So I dug out my Petal Cone die and cut two acetate die cuts. I converted the cone die cuts to a box shape by trimming the bottom inch off each then scoring and folding the next inch under to form the bottom of the box. I used sticky strip to hold it all together and then added DSP (on the outside) and cardstock (on the inside) on two sides of the box to hide where the box was adhered together. I decorated all the flaps with scalloped cardstock and DSP, but reversed the orientation on the opposite flaps (hope that makes sense - just look at the pics to see what I mean).  I shredded some white tissue paper to act as a bed for the strawberries, tucked them and  then in the flaps folded up I punched holes and threaded through some taffeta ribbon, tying it in a bow to secure it all. Lastly I added a Christmas tag with some linen thread.

Hope you are all on the home stretch with the Christmas preparations - and then enjoy a Christmas filled with peace, love and joy!!

Thanks for visiting,
Kim

Box
Recipe: All SU! unless otherwise noted
Stamps: Holiday Lights (PaperTrey Inc)
Cardstock: Old Olive, Real Red
Ink: Real Red
Accessories: Petal Cone BigZL die, Bella Rose DSP (R), Beautiful Blooms DSP (PaperTrey Inc), 1/8" Old Olive taffeta ribbon, Linen Thread, 2" scalloped circle punch, 1 3/4" circle punch, Jewels - rhinestones, Sticky Strip, Scor Tape

Strawberries
Red and green wool felt, White embroidery thread, 1/8" Old Olive taffeta ribbon, shell button

Tuesday, December 20, 2011

Inkspirations 100 - Inspired By

Hello there,
well an extra post in a week has been a rarity for me in the last six months or more, just to busy balancing family, work etc. But when I saw Makeesha Byl's post that the Inkspiration challenges were shutting up shop and were going out with one last challenge - well I just had to join in. The Inkspiration challenges were the first challenges that I participated in and I had the great delight of being a guest designer a couple of times. The design team have never failed to produce innovative and just plain gorgeous work! The challenge was to show your Christmas projects - what ever you've been making for the Christmas season - decorations or gifts. I decided use the card and gifts I made for my Miss 6 teacher. Here they are.


I started with the card - and went just a little vintage using the super cute little Christmas girl from Greeting Card kids, colouring her in with copics. I added some gold highlights to the Christmas tree and dazzling diamonds to her hat. I especially liked the slightly distressed feel I got by embossing the DSP panel on the bottom! I had been planning to using the same DSP on the pencil box which my Miss 6 described as "awesome". I loved it too!! This is one of the inspired by elements - I purchased the template from Ilina Crouse's blog (one of the Inkspirations DT) . I pretty much followed Ilina's instructions as is, just changed up some of the colours and retro fitted some extra tabs to hold the bottom on. So anyway back to the DSP - I was going to use the same but Miss 6 said she wanted numbers and so I dug out some other DSP, colours all still matched so it all still works. As you can see the top of the "pencil" flips open. I stuffed it full of chocolates and then perched the brooch I made on the little shelf at the top. The brooch is my other inspired by element - I was lucky enough to get a gorgeous brooch by Michelle Martin at the SU! convention this year. So I decided to make one of my own. In a nutshell I just stamped some swirls on some DSP, punched out a flower shape, then 4 more flowers of cardstock. Use Tombow to adhere all these layers together, leave to dry. Then give the top a coating of crystal effects, pressing the ribbon threaded button into this and leave it all the dry and set. The next day turn over and coat back with crystal effect pressing the broach pin into it and leave to dry.

Miss 6's teacher was delighted, and I'm slowly nibbling my way through the chocolates that couldn't fit into the box - bonus ;)

Thanks for visiting - and a big thanks to the Inkspiration team - I will miss the challenges and the wonderful inspiration you all provided!

Kim

Card
Recipe: All SU! unless otherwise noted
Stamps: Greeting Card Kids, Holiday Button Bits (PaperTrey Inc)
Cardstock: Real Red, Baja Breeze, Whisper White, X Press copic blending card
Ink: Chocolate Chip
Accessories: Vintage Wallpaper embossing folder, Medium Jewelery Tag punch, Lacey and classic circles nestability (Spellbinder), Baja Breeze seam binding, Copic markers, Gold leaf pen, Dazzling Diamonds, Ski Slope DSP (R), Linen Thread, Dimensionals, Two way glue pen, Double sided tape, SNAIL adhesive.

Pencil Box
Recipe: All SU! unless other wise noted
Stamps: Tart and Tangy (R)
Cardstock: Real Red, Basic Black, Sahara Sand, Whisper White
Ink: Real Red, Chocolate Chip, Old Olive
Accessories: Celebrations DSP (R), Sticky strip, Double sided tape, Tombow multi

Brooch
Recipe: All SU! unless otherwise noted
Stamps: Barque Motifs
Cardstock: Riding Hood Red
Ink: Black Stazon
Accessories: Love Letter DSP (R), Black button, 1/8" Real Red taffeta, Boho Blossom punch, Tombow multi, Crystal effects, sponge, brooch pin (craft store)

Friday, December 16, 2011

JAI 98 - Just add sparkle


Well hello there :)
How is everyone tracking with their Christmas preparations? I'm finally making headway with mine but still have a stack of cards to write and post out.  This week at Just Add Ink we have a very appropriate challenge for the Christmas season - its Just Add Sparkle. I had a special Christmas card in mind for this challenge...here it is.

This one came together pretty quickly once I had the colour combo, I wanted something a little vintage and soft to go with the gorgeous angel die that I planned to use. So first up a Pear Pizzazz base, then a Perfect Plum mat, then the vanilla top mat. I stamped a frame of greenery around the panel, adding Plum and Blushing Bride berries. Then I die cut and stamped my angel, and added a hanger for her. Finishing touches include the sparkle (of course ;) rhinestones "berries" and glass glitter on the wings, and a sentiment - a very appropriate one in my case as the card has already made its way to my parents :)

As usual at the momment I dead knackered so that is from me!! Have a good week and check out the rest of the amazing DT offerings  - they are stunning!

Thanks for visiting,
Kim

Recipe: All SU! unless otherwise noted
Stamps: Tree Trimmings, Love Lives Here: Holiday (PaperTrey Inc)
Cardstock: Pear Pizzazz, Perfect Plum, Very Vanilla
Ink: Pear Pizzazz, Perfect Plum, Blushing Bride, Early Expresso
Accessories: Love Lives Here" Holiday dies (PaperTrey Inc), Corner Rounder punch, Silver glass glitter, Jewels - rhinestones, Tombow multi, Dimensionals, Double sided tape

Friday, December 9, 2011

JAI 97 - Just add inspiration


Hello there!

well this week at Just Add Ink we have a very bright inspirational photo for you brought to you by the lovely Jo Eades. Jo's suggested colours to go with the photo are Poppy Parade, Lucky Limeade, Pool Party and Melon Mambo...want to see ;)

And this is what I made of it.

I have got to admit I did struggle with this one, in fact this card was sooo close to being binned! But a bit of last minute readjusting and I came out with something I half like. The colours suggested tropical flowers to me, with a dash of aqua to cool it all down. So starting point - lots of flowers in Melon Mambo, the layers were made by stamping and then stamping again to get the lighter shade. The red flowers were one layer of Real Red and one of Poppy Parade. The layered flowers were arranged on an oval base, and dressed up with some Limeade greenery. I kept the background neutral, but added some texture using embossing. I really like the distressed effect you get by running DSP through an embossing folder - nice :) Finishing touches - lots of rhinestones and some Pool Party ribbon.

Hopefully that gives you the general idea - I promised myself I would get to bed early earlier today so I need to get my weary body to bed otherwise my brain will be mush tomorrow!

Thanks for visiting,

Kim

Recipe: All SU! unless otherwise noted
Stamps: Array of Sunshine, Teeny Tiny Sentiments
Cardstock: Melon Mambo, Pool Party, Whisper White
Ink: Melon Mambo, Lucky Limeade, Real Red, Poppy Parade
Accessories: Rasberry Fizz DSP (R), Linen and Canvas Impression Plate (PaperTrey Inc), Vintage Wallpaper embossing folder, Ticket corner punch, Modern Label punch, Word window punch, Classic oval and scalloped oval nestabilities (Spellbinder), Pool Party ruffled ribbon, Dimensionals, Double sided tape, Jewels - rhinestones.

Friday, December 2, 2011

JAI 96 - Just add Tania Gould

Hello there,
how is everyone going at this busy time of year? I still have a heap of half completed projects I want need to get done by Christmas, although I am making progress. But our December calender is filling up with work Christmas lunches (yes lunches ;), Christmas shopping - yikes!!, school end of year concerts and fetes etc etc. It's all fun and crazy at the same time - I am seriously hanging out for some time to chill at Christmas!

OK enough blather!! We have a great challenge for you this week at Just Add Ink - we want you to just add one of the team - Tania Gould. The idea is to go and have a look at some of Tania's work and pick something to CASE or be inspired by. It won't be hard trust me! I was stopped  in my tracks by a gorgeous mini book Tania made recently, check out her post here. And here is a pic so you can see where I started from.

Now this is where I went with it.
One of the pages open

The back.
My version is going to be a mini photo album of some highlights of 2011, and will be going to one of the family grandmother's as a Christmas present. I started by cutting two thick chipboard Top note die cuts, then another two inserts in a thinner chipboard. Then I cut eight Top note die cuts from First Edition DSP. Then it was time to get sticky - I used Tombow to glue all the DSP Top notes to the chipboard Top notes then left them to dry for a day or two. Then I went around all the edges with some distress type ink. Now I wanted to use a silhouette image like Tania did in the bottom LHS corner - so I pulled out Upsy Daisy and then got to try something I have been wanting to do for ages, ever since seeing this post by Amanda Reddicliffe , way back in May. Yes I played with different coloured embossing powders (so pleased that SU! has introduced some coloured ones!). It was a bit hit and miss as I could hardly see the versamark image on the DSP but I took my best guess and sprinkled the coloured powder about. I LOVE how it turned out. And then I got to do it again, so I could have another embossed Upsy Daisy image on the back :) and of course every single one is unqiue. Anyway I just added some die cut numbers to the front and punched the holes for the album rings.  Now I just need to add the photos, some journalling and a few extra embellishments - I'm thinking some stamped brightly coloured flowers - to finish up this Christmas present!

Thanks for visiting and do go and check Tania out!
Kim

Recipe: All SU! unless otherwise noted
Stamps: Upsy Daisy
Cardstock: Textured Early Expresso
Ink: Versamark
Accessories: Timeless Type alphabet sizzlet, Top note die, First Edition DSP, Melon Mambo and Tempting Turquoise embossing powder, Leaf, Butter and Apricot embossing powder (Zing), Chai ink (PaperTrey Inc), Cropodile, album ringlets (Kaiser), Tombow multi, adhesive sheet

Friday, November 25, 2011

JAI 95 - Bah Humbug


Bah Humbug? Well not exactly - lol! But we do have a Christmas challenge with a twist for you this week at Just Add Ink.  Our challenge this week is to make a Christmas card but NO Christmas images allowed, NO traditional Christmas paper allowed! We want you to stamp a Christmas greeting and have some fun with some non traditional stamps. So get your thinking caps on ;) and see what fun ideas you can come up with.  I made a couple of "Bah Humbug" card versions as swaps for the Canberra regionals so I just stepped one up a bit as my offering this week. Here it is.


Just realised that I didn't get around to doing the inside for this one - oops! I'm somewhat distracted at the momment juggling lots of ready by Christmas crafting projects - not to mention the usual everyday business of work and family life. I've enjoyed using some different Christmas colour combos and this is another one I wanted to try - Old Olive, Perfect Plum and Riding Hood Red. My starting point was the idea of a button tree, so I cut myself a rough template, dottoed that down onto my white mat and started stamping buttons :) I used a Christmas sentiment stamped twice to create the trunk of the tree. To dress it up I added a few real buttons, some rhinestones and some star shaped brads, a Old Olive taffeta bow, and lastly to top the tree a glittery star (Boho flower punch). A scalloped border, with piercing detail down the right finishes it all off.

Do check out the other design team members they will all have some wonderful inspiration for you, and then perhaps you can have some fun and see what you come up with!

Thanks for visiting,
Kim

Recipe: All SU! unless otherwise noted
Stamps: Button button, Teeny Tiny Sentiments
Cardstock: Old Olive, Perfect Plum, Whisper White
Ink: Old Olive, Perfect Plum, Riding Hood Red
Accessories: Scallop border punch, 1/2" circle punch, Boho Blossom punch, Old Olive 1/8" taffeta ribbon, Jewels- rhinestones, Mat pack and piercing tool, Green glitter cardstock (Spotlight), Star Brads (The Paper Mill), Dimensionals, Double sided tape, Dotto, Sticky Strip, Tombow multi

Friday, November 18, 2011

JAI 94 - just add a sketch

Hello there :)

well you can tell we are heading into the home stretch heading to Christmas (well it kind of feels that way as things get busier and busier), ah and may'be the predominance of Christmas cards and projects might be a clue too (smile). I have already made lots of Christmas cards this year (mostly finished) - but I just can't seem to stop making them!! So this weeks Just Add Ink sketch challenge - well you can probably guess...is...a...Christmas...card. Here's the sketch.
I did turn this sketch around in my head for a few days, and then at the last minute changed my mind, as you do sometimes. To change things up I went with an alternate red/green combo - Rose Red and Garden Green.


This a real mix of old and new (old favourite scallop die and new stamps). First up I cut a scalloped circle base for the card, added a Garden Green mat, then on the top Whisper White mat I started by stamping a garland of greenery. Embellishing it with some little Rose Red berries and some little sparkly rhinestones. Hanging from the garland are three little Christmas ornaments mounted up on dimensionals. The front was finished off with a sentiment and few extra little embellishing touches - piercing detail on all the scallops and dazzling diamonds on the tiny little heart on the middle ornament. The inside was finished off simply to match.

Thanks for visiting, perhaps you'll get the chance to give the sketch a go and make... a... Christmas... card... (smile).

Kim

Recipe: All SU! unless otherwise noted
Stamps: Love Lives Here: Holiday (PaperTrey Inc) , Think Big Favorites #8 (PTI)
Cardstock: Rose Red, Garden Green, Whisper White
Ink: Rose Red, Garden Green
Accessories: Scallop Circle BigZ die, Classic Circle nestabilities (Spellbinder), small Star punch (R), 1/2" circle punch, Jewels: Rhinestones, Two way glue pen, Dazzling Diamonds, Dimensionals, Double sided tape (X Press)

Friday, November 11, 2011

JAI 93 - just add a colour combo


Hello there :)

welcome back for another Just Add Ink challenge. This week we have a colour combo (and yep umm I did come up with this one!).  Here are the colours.

The first thing that popped into my head was gelato icecream. So what flavours? Well Mambo would have to be watermelon, the celery - perhaps pistacio or lime - but I must admit - Pool Party had me stumped - not to many foods appears on your plate blue!! Any suggestions? But in the end I went with flowers as I had a new (free!! ) flower set - Fabulous Florets (prize patrol at Regionals yah :) - just calling my name to play with it. So here is the outcome.


I coudn't resist rock and rolling again - it adds such a great random shading effect. So first up I inked up my solid flower in Pool Party and then rock and rolled in Melon Mambo - alot of times. Then I trimmed out a whole bunch of different layers for each flower (alot of times - lol - its a good idea to do this watching tv! but the end effect is worth it). I also stamped and trimmed out one foliage spray for layering as well. The layers were piled up on dimensionals, and once they were finally placed I also went around each petal with a glitter pen which if you catch the light the right way really adds a lovely sparkle.  The rest of the card is pretty straightforward using a recent Sweet Sunday Sketch Challenge sketch (#133) as its starting point. So Mambo base, then Pool Party mat, then DSP (old and new), I zigzagged around all that to add some subtlish detail (subtle cause the thread was white and mostly disappears). The flowers are framed with a Blossom Spellbinder diecut and the sentiment was added on a flag ended banner - Melon Mambo embossed (more new stuff to play with :) A few hot pink pearls finished off the front and the inside was finished off to match.

I certainly enjoyed playing with some new stamping stuff and this gelato rainbow of colours. Thanks for visiting and I hope you get the chance to play along this week :) and don't forget to check out the rest of the design team!

Kim

Recipe: All SU! unless otherwise noted
Stamps: Fabulous Florets, Curly Cute
Cardstock: Melon Mambo, Pool Party, Whisper White
Ink: Melon Mambo, Pool Party, Certainly Celery, Versamark
Accessories: Flirtaceous DSP, Fall Flowers DSP (R), Melon Mambo scalloped dotty grosgrain, Melon Mambo embossing powder, Blossom and circle nestabilities (Spellbinder), Doubled ended banner die (PaperTrey Inc), Pink pearls (Kaiser), Spica glitter pen, sewing machine, Double sided tape (X Press), Dimensionals

Friday, November 4, 2011

JAI 92 - Just add a tag or a bookmark


Hello there,
well we have something fun for you this week at Just Add Ink. This week we want you to Just Add a Tag or a Bookmark - there are so many possibilities open with this challenge and we will certainly enjoying seeing what you make of it! I am travelling back in time for my "just add a" - to September and Father's Day. This is what I came up with...


Super simple inside  - just a little picnic basket as that was what we were planning for Father's Day.
I started with the idea that I wanted to recreate the family on a tag and have the tag as the feature panel on a card. So with my handy Stamp ma jig I stamped out all the family (including our puss - he thinks he is the first child!) and then coloured us all up to match my colour palette (Pacific Point and Real Red - bright boy colours). (The tag I just created by cutting cardstock to the size I needed to fit us all in). I added some texture by embossing the top mat of the main card, and finishing touches include a nice big strip of ribbon to underlay the main panel and then another bit to be tied off as the tag flag. Of course being a boy card I had to add some hardware - so out came the large eyelet ;) Oh and as the final touch a little heart balloon that DH and I are holding to just add that little touch of love to father day.

Thanks for visiting, oh and don't forget to visit the rest of the DT for some awesome tag/ book mark ideas!
Kim

Recipe: All SU! unless otherwise noted
Stamps: All in the Family, Family Favourites, Teeny Tiny Sentiments
Cardstock: Pacific Point, Whisper White, X Press blending white cardstock
Ink: Tuxedo Black (Memento)
Accessories: Square Lattice embossing folder, Modern Label punch, Word window punch, 3/4" circle punch, small heart punch, Antique Pewter eyelet (R), Real Red striped grosgrain ribbon (R), White gel pen, Copic markers (B02, B05, B06, RV14, R24, R27, R29, E000, E01, E13, E19, E33, E35, E39, E71, E74, E77), Black embroidery thread, Double sided tape, SNAIL adhesive, Glue dots, Dimensionals

Friday, October 28, 2011

JAI 91 - just add a colour combo


Hello there :)

welcome back for another Just Add Ink challenge. This week we have a colour combo with a twist - you get to pick part of the combo. Here's the combo to work with.(Blushing Bride, Cherry Cobler, Neutral of choice)
Blushing Bride and Cherry Cobler said flowers to me and since it gave me the chance to ink up my new Field Flowers set - one that was on my must have list - well flowers it was with a gentle vintage feel. Here's what came out of a very late Saturday night session of crafting.


First up I used a Sweet Sunday Sketch (#136) as my starting point, I will also confess to being slightly liberal with the conditions of the colour challenge as strictly speaking I used two neutrals - Very Vanilla and Chocolate Chip - but it was only a tiny smiggin of Chocolate. But it just wouldn't have worked without them both. So very quickly I started by inking up the flower overlay stamp in Blushing Bride and then rock and rolling in Cherry. I did that a little different for each flower. Then using the more solid flower  stamped over that in Blushing Bride. The centres were all stamped with the overlay in Cherry and solid centre in Blushing Bride. I then trimmed all the flowers out and mounted them up on dimensionals above the stems stamped on First Edition DSP. To continue the text theme I also stamped a text background in stamped off Cherry onto Blushing Bride as the top mat for the main card panel. I gentley distressed the edges of the all the mats, and also sponged some Blushing Bride and Cherry Cobler as well. The front was finished off with some satin ribbon, and lace, as well as some Pewter hodgepode from my stash. Oh and just before I went to photograph the card I added some clear glaze dots onto the centre of the flowers to give a bit of shine and texture. As usual I followed through the theme to the inside.

Its been a while since I had a go at something a bit vintagey - I had fun :) and it was worth the late night. I would really like to try using Field Flowers with bright bold colours and in a more modern style however and see how that turns out - I'll let you know ;)

So what will you make of this weeks colour challenge?

Thanks for visiting,
Kim

Recipe: All SU! unless otherwise noted.
Stamps: Field Flowers, French Foliage, Watercolor Trio (R), Background Basics Textstyle (PaperTrey Inc)
Cardstock: Cherry Cobler, Blushing Bride, Very Vanilla
Ink: Cherry Cobler, Blushing Bride, Chocolate Chip
Accessories: First Edition DSP, Chantilly crochet trim, Sakura glaze pen, "Cherry" stain ribbon (local craft shop), Pewter Hodgepodge (R), Double sided tape (X Press), Dimensionals

Friday, October 21, 2011

JAI 90 - just add a sketch


Ooh its so hard to capture the sparkle in the project I have for you today!! But oh my it is so pretty and funnily enough adds some texture too as its embossed sparkle. Ok more on that later. First up let me introduce you to this weeks Just Add Ink challenge. This week we have a sketch for you. Here it is.


It occured to me I could replace the oval with another shape - and the shape of my choice - a Christmas tree. I've been wanting to make this felt Christmas tree card for nearly a year now - yah!


So my starting point was to cut a Christmas tree from felt and then arrange and stitch on some little buttons to be "ornaments". The colour palette was based off the DSP I used for the scalloped element. A bit non traditional but I liked it. I didn't want to pull too much attention away from the tree so I kept the background neutral, instead running an old SU Christmas wheel over with versamark and then embossing with glittered embossing powder. So not only does it seriously sparkle but you catch glimpses of Christmas sentiments as well. I finished the card off by adding a tree trunk, and a little taffeta bow with little sentiment tags.

I'm really pleased I finally got the chance to make my felt Christmas tree card!! Perhaps you might use this weeks sketch to get some project you've been wanting to do - done!

Thanks for visiting,
Kim

Recipe: All SU! unless otherwise noted
Stamps: Teeny Tiny Sentiments, All About Christmas (R), Tree Trimming Trio (PaperTrey Inc)
Cardstock: Old Olive, Whisper White
Ink: Versamark, Chocolate Chip
Accessories: Christmas Tree die and large scalloped border die (PaperTrey Inc), Simply Chartreuse felt (Papertrey Inc), Sweet Blush, Spring Rain and Pure Poppy vintage buttons (PaperTrey Inc), Christmas Carnival DSP (Kaiser), Medium Jewelery Tag punch, Old Olive 1/8" taffeta ribbon, Irridescent Ice embossing powder, Sticky Strip, Dimensional, Double sided tape (X Press)

Friday, October 14, 2011

JAI 89- just add inspiration


Well hello there,

I've been enjoying a few days holiday in Sydney squeezing in some shopping for me :) and beach visits to the kids delight. But even better was the chance to meet up a with a really lovely stamping friend Di Barnes. Hi Di :) As it happens the card I made for todays challenge is the one I gave to Di for her birthday. So what is the Just Add Ink challenge this week? Well cast your eyes down at the photo below as the this weeks challenge is an inspiration photo.


What a gorgeous scene! There are so many things to inspire in this photo! I decided I wanted to reflect the colours and how the tree seems to spread both up and down. So here is the end result.

As you can see I had a lot of fun using some still new crafting goodies. Usually I shie away from lots of white but it just seemed to work for this project. So I started by impressing a pattern on my front white panel. Then I stamped the large leafy flourish twice after working out where I wanted my central frame to go. Then embossed my black frame, trimmed it out, and then stamped my butterfly and sentiment. The butterflies were all inked up using markers and I used a blender pen to just blur the colours together a little. Another butterfly was mounted on top, embellished with a rhinestone and a few more rhinestones scattered about. That top white panel was mounted on dimensionals above the base card.

I was quite pleased how this one turned out - definitely more CAS than usual for me.

Thanks for visiting and do try and check out the other DT members as it will really inspire you!
Kim
Recipe: All SU! unless otherwise noted
Stamps: Creative Elements, Vintage Labels (R)
Cardstock: Whisper White, Basic Black
Ink: Stazon Black, Daffodil Delight, Pumpkin Pie, Tangerine Tango, Real Red, Basic Black
Accessories: Designer Frames embossing folder, Corner rounder punch, Linen/Canvas impression plate (PaperTrey Inc), Jewels - rhinestones, Dimensionals, Double sided tape

Friday, October 7, 2011

JAI 88 - just add a die cut


Hello there,

well today Just Add Ink has a challenge for you that is dear to my heart. It is just add a die cut. I LOVE to die cut and emboss and rarely produce something that doesn't involve one or the other, or even better both!! My die collection is needless to say rather extensive :) So really adding a die cut wasn't much of a challenge for me, rather it was working with pinks perhaps?? that I struggled with this time - in fact this card was my second go at the challenge as something just nagged at me (couldn't figure out what!) with my first effort. This one got the thumbs up from my Miss 6 - no surprise when its a combination of pink, butterflies and lots of shimmer and bling (smile). Ok here it is.


I started with a big die, the Scallop square card base, and finished by embellishing with tiny little die cut butterflies! So a Pretty in Pink base, layered with a Shimmer white mat, an embossed Pretty in Pink top layer. I made sure to only embossed the upper and lower areas as I wanted to leave a clear area to stamp and emboss the sentiment. The embossed areas were also misted with Frost White shimmer mist. Lastly the front was finished off with a row of bejeweled Shimmer White butterflies and a white taffeta bow. On the inside I added another row of butterflies but this time in pinks. 

So minimal stamping in this one, but lots and lots of shimmer, shine and bling - and some die cutting of course - lol!

Thanks for visiting, don't forget to go check out the other DT offerings they are just fabulous as usual!

Kim

Recipe: All SU! unless otherwise noted
Stamps: Curly Cute
Cardstock: Pretty in Pink, Melon Mambo, Pink Pirouette, Whisper White, Shimmer White (PaperTrey Inc)
Ink: Melon Mambo, Versamark
Accessories: Scallop Square BigZ die, Beautiful Wings embosslit, Final Press embossing folder, Clear embossing powder, White taffeta ribbon, Frost White shimmer paint, Isocol, Sticky strip, Jewels - rhinestones, Double sided tape

Friday, September 30, 2011

JAI 87 - just add a colour combo

Hello there,

well I've been experimenting with a new card fold again this week (Ok actually several weeks ago - just as well considering the run of germs through the house recently). After having seen Patrice's (Patrice Easton) gorgeous telescoping circles card when Just Add Ink ran our fancy folds blog hop I was intrigued and it was at the top of my list to try so when the colour combo we have for the challenge this week came up well I decided to try colour and fold out together! Here's the colour combo.
(The colours are Pool Party, Calypso Coral, Crumb Cake and Whisper White) It might be hard to see what they are from the tiny colour swatch - need to talk to one of our JAI IT gurus about why thats happening! The lovely light colour scheme made me think of flowers and I couldn't resist pulling out my Eastern Blooms set, another advantage is that this set works well with markers which is all I have for the new in colours so far! So first up the unfolded card.

The fully unfolded version.
And now a close up of each layer.


I kept the design fairly simple, using the same elements on the first and third layers, but changing it up for the middle panel. Really it's all pretty straightforward inking and trimming out, and then all just finished off with paper pierced borders, and rhinestones. You can find a link to a tutorial for this type of card fold here.

Well I hope you find this colour combo as light and lucious (like a summer breeze) as I did :)
Thanks for visiting,
Kim

Recipe: All SU! unless otherwise noted
Stamps: Eastern Blooms (R), Well Scripted (R), It's Your Day, Iconic Images (PaperTrey Inc)
Cardstock: Pool Party, Calypso Coral, Whisper White, Crumb Cake
Ink: Pool Party, Calypso Coral, Crumb Cake
Accessories: Scalloped Circle BigZ die, Classic Circle nestabillites (Spellbinder), Swirls and Scribbles sizzlet, Punch Pack, Jewels - rhinestones, Crumb Cake taffeta ribbon (R), Silver brads, Mat pack and piercing tool, dimensionals, Double sided tape.