Friday, May 27, 2016

JAI #313 Just add B


Hello there,
this week at Just Add Ink Tina has suggested that we Just Add B. Add B?? Well that means you can add anything starting with B. It could be a colour like Blushing Bride or Bermuda Bay or just blue, something like a bear, a badger, a bottle or a technique like using baby wipes, bleach or bokeh. As long as it's the main focus of your project. This gives you lots of scope to try something you love or something new! 

As you've probably guessed I decided to add bears (and birthday!).


I started by using a stencil to add a scattering of stars to my card front which I then embossed. Next step was to brayer a gradient of blue over the stars. After that it was just adding the other elements on top. The bears, balloon and presents I coloured in with copics. It takes time but it's such a relaxing thing to do to just sit down and colour! I finished off the balloon with a sheen of Wink of Stella. That and the glint of sliver trim and cord add the required amount of bling ;) 

Hope can join us this week. Do go check out the rest of the DT projects you'll be inspired!

Thanks for visiting,
Kim

Recipe: All SU! unless otherwise noted
Stamps: Perpetual Birthday Calendar, Birthday Bears (My Favorite Things)
Cardstock: Pool Party, Bermuda Bay, Whisper White
Ink: Island Indigo, Bermuda Bay, Pool Party, Tuxedo Black (Memento)
Accessories: Hearts and Stars Decorative Mask, Birthday Bears dienamics (My Favorite Things), Stitched Circles (Simon Says Stamp). Copic markers, Silver glimmer, Silver foil, Brayer, White embossing powder, Wink of Stella, White gel pen, Silver cord (R), Dimensionals, Tear and Tape 

Friday, May 20, 2016

JAI #312 Just add a colour combo


Hello there,
well this week at Just add Ink we are very blue and it's all Patrice's fault. Yes, it is! All because she suggested the colour combination for this week's new challenge. In all honestly I was a bit hesitant about this combination but was pleasantly surprised when I pulled the colours out that they play really nicely together. Want to see for yourself? Then please join us. Here are the colours.

And here is my end result.


Unfortunately I have already had to use the sympathy card I made a few weeks ago and since I felt the colour palette lent itself to that theme I decided it was a good time to make one for my stash. I tried to keep it fairly CAS, well for me anyway. I stamped my flowers in a combination of Mint Macaron, Bermuda Bay and either Marina Mist or Pacific Point as the top detailed layer. For the leaves I omitted the Mint Macaron. Besides the flowers the only other details added include the gradient sponging, some delicate stamped texture and then a light Wink of Stella splatter - oh and the pearls. I'm a little worried I might have glammed this up too much for a sympathy card. Ah well hopefully I'll have have some time to think on it.

Don't forget to visit the rest of the DT for lots of colour inspiration!
Thanks for visiting,
Kim

Recipe: All SU! unless otherwise noted
Stamps: Picture Perfect, Timeless Textures, Keep it Simple: Sympathy (PaperTrey Ink)
Cardstock: Mint Macaron, Pacific Point, Whisper White
Ink: Mint Macaron, Bermuda Bay, Marina Mist, Pacific Point, Versamark
Accessories: Linen/Canvas impression plate (PTI), White embossing powder, Wink of Stella, Sponges, Jewels - pearls, Tear and tape, Dimensionals

Friday, May 13, 2016

JAI #311 Just add masking


Hello there,
I'm out the other side from a lingering slightly icky, beginning of winter, cold. It's so nice to be feeling better and decidedly more human again! The ickiness definitely interfered with my inspirational process - it took me the whole week to finally come up with an idea for this week's Just Add Ink challenge. This week it's Just Add Masking suggested by Nikki. Here is what I came up with - finally!


And the inside.


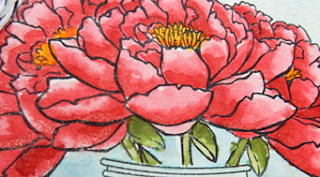
Are you seeing a sneak peek from the new upcoming SU! catalogue? No - just something old I have in my stamping stash ;) Pulling out the jar was definitely inspired by the new catalogue though. I thought pairing it up with the flower from 'You've Got This' would be a good approach to masking. I used two masking techniques here in fact. First, I masked the central flower and the rim of the jar while I stamped the other two flowers that are tucked behind. (When you mask the first image you stamp this is the one that remains at the front.) Then I painted over the entire stamped image with masking fluid. Once it was dry I water coloured the front panel adding some shadows around the flowers and at the base, then some water splatter and finally sparkle (Wink of Stella splatter). This is what the panel looked like at this point.


Then I rubbed the masking off and went ahead and water coloured the flowers using an aquapainter and ink pad lids. I couldn't resist adding a tiny shaker to the jar too. It's almost unheard off for me not to add a sentiment to my card fronts but I felt adding one would spoil it!

It was a lot of fun to play around with masking, I know you'll find the projects from the rest of the DT to be super inspirational! Hope you can join us this week.

Thanks for visiting,
Kim

Recipe: All SU! unless otherwise noted
Stamps: You've Got This, Friendship Jar (PaperTrey Ink)
Cardstock: Real Red, Basic Black, Very Vanilla, Vellum
Ink: Cherry Cobler, Real Red, Wild Wasabi, Mossy Meadow, Soft Sky, Pool Party, Island Indigo, Basic Gray, Stazon Black
Accessories: Typeset DSP, watercolour paper, SU! sequins (R), Silver sequins, Wink of Stella, Aquapainter, Basic Black Baker's twine, Tear and Tape, Dimensionals, Masking paper (Simon Says Stamp), Elmer's Rubber Cement Craft Bond Adhesive

Friday, May 6, 2016

JAI #310 Just add a sketch


Hello there,
can I tell you how much I am enjoying the gorgeous Autumn weather we are having. I love the crisp air but what I love the most are the bright jewel colours on the trees. Sometimes I am literally spellbound with wonder as I walk around streets in our suburb. I think it's hard to beat that as way to start the day! I used some bright colours for the new challenge we have for you at Just Add Ink this week. This week Tina has given us a great sketch to work with. Here it is. 


I decided to frame mine up on a traditional rectangle card base. I also played with the idea of negative framing the sketch element by tucking the flowers in behind it. Here is how it turned out.

And the inside.


I added doodling to some of my OnStage samples that I posted last week and the thought came to me that I could do the same thing with other stamp sets. So I pulled out Flower Patch stamped up a bunch of flowers and then sat down and outlined them all. I wasn't being precious about it - lines going a bit wobbly was ok! It was just going to add to the character ;)
Having done that I hid half of them! - well about half of each flower as I tucked them in under the central (sketch) element. I have to say I really like the contrast the fine black edging gave to them. I kept the rest of the card pretty CAS just adding a clear embossing background to the base. This was a kind of fun technique to try so you might just see me pull it out again!

Don't forget to check out the rest of the DT for some fabulous sketch inspiration!

Thanks for visiting,
Kim

Recipe: All SU! unless otherwise noted
Stamps: Flower Patch, Birthday Blooms, Diagonal Stripes (My Favorite Things)
Cardstock: Whisper White, Flirty Flamingo
Ink: Real Red, Watermelon Wonder, Calypso Coral, Flirty Flamingo, Blushing Bride (these colours actually look great together!), Tuxedo Black (Memento) 
Accessories: Flower Fair framelits, Stitched Circles die (Simon Says Stamp), Banner die (My Favorite Things), In Color 2016-2018 DSP, 0.3 m Memento marker, Clear embossing powder, Sparkling Clear sequins (Pretty Pink Posh), Fine Tip Glue pen, Tear and tape, Dimensionals

Monday, May 2, 2016

OnStage Sydney Display Stamper Swirly Bird Sweet Sugarplum


Hello there,
well today I am going to finish off my OnStage samples with Sweet Sugarplum. 


Sweet Sugarplum and Rose Red swirly flowers with some touches of silver. The flower stem images in the set work great as leaf veining too!


I used the solid part of the kite image to add some background detail here. As well as using Sweet Sugarplum and Emerald Envy to colour the flower.


The swirl image makes a great atmospheric background for a butterfly. I paired Sweet Sugarplum with Rich Razzleberry and Elegant Eggplant and lots of gold.


One last shaker to finish off with. I stitched vellum over Sweet Sugarplum DSP and added in silver sequins. Clear embossed little flowers add some interest to the white background and are stamped and water coloured as the feature too. 

Thanks for much for dropping by while I was showcasing my samples. I'll be back again next Friday with a new Just Add Ink challenge post.

Kim

Sunday, May 1, 2016

OnStage Sydney Display Samples Swirly Bird Dapper Denim


Well things got a bit busy but finally it's time to show you my OnStage Dapper Denim samples. It's a nice blue to work with.


I mixed Dapper Denim with some of SU! current soft blues and greens. It looks great with Kraft too!


With Real Red and Cherry Cobler - the little boat is the perfect size to put in a shaker.


Mixed with neutrals to create a rustic baby card (I used a marker to add the dot detail to the eggs)


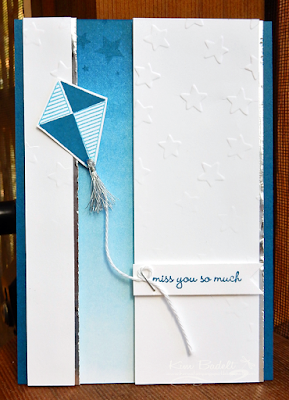
A CAS simple one to finish. Denim Dapper sponged in a gradient mixed with a tiny touch of Marina Mist on the kite and silver.

Thanks for visiting,
Kim