Showing posts with label anniversary. Show all posts

Friday, June 9, 2017

JAI 363 Anniversary


Hello there,
well winter has hit and it is definitely chilly but we have also had the most beautiful sunny days. The gorgeous weather pulls me outside for a walk and after that I'm more than happy to stay inside and craft as it gets chilly. That's not a bad combination really! (This week was also the week my new catty BBB arrived :o but since I was working you'll have to wait a bit longer till you see any projects.) Of course I do have something for the new Just Add Ink challenge - this week Chantell has challenged us to Just Add Anniversary. We all need anniversary cards sometimes so this is a great chance to get one in your stash for right when you need it!


I mulled my design over and over and over! Couldn't make up my mind, had an idea, started to craft and came up with something different - go figure! Here's how it turned out.


I started by having a play and 'smooshing' my background with Powder Pink and Real Red ink. After drying that I flicked some water on it to add a little more texture. The last touch was to stamp faint repeated lines of hearts down the card and then flick Wink of Stella over the whole thing. The top layer is a big red glimmer heart that is overlaid with a banner sentiment. I needed to introduce some colour to the banner so I used my copic markers to add some ombre shading. The heart is off set with floral sprays and flowers. A little stitching detail and some new sparkly sequins (loving those tiny wee ones!) finish it all off. After agonising for days (not joking!) the design in the end actually came together quite quickly and I'm all set for my parent's wedding anniversary later this year!

Don't forget to check out the rest of the DT's project for lots of inspiration!
Thanks for visiting,
Kim

Recipe: All SU! unless otherwise noted
Stamps: Jar of Love, Birthday Blooms, Banners for You
Cardstock: Real Red, Lemon Lime Twist, Whisper White
Ink: Powder Pink, Blushing Bride, Real Red, Melon Mambo, Lemon Lime Twist, Garden Green, Tuxedo Black (Memento)
Accessories: Bunch of Banners framelits, Everyday Jars framelits, Hearts Collection framelits (R), Red glimmer paper, Watercolor paper, Clear Wink of Stella, Clear embossing powder, Copic markers,  Iridescent sequins, Dimensionals, Tear and Tape

Friday, December 2, 2016

JAI #339 Sketch


Well hello,
I actually had a weekend at home last weekend and that meant I had some time to craft (but only after I got our overdue tax paperwork sorted - groan! It was a good motivator to get that job out of the way though!). This week's Just Add Ink challenge proved to be perfect for my purposes. This week Narelle wants us to Just Add a Sketch. Here it is.

And here is what I made of it.


The inside.

As you can probably guess this is for a very significant anniversary (the tag is a tiny clue ;). This year just before Christmas my parents reach the truly inspirational milestone of 60 years of marriage. So a special card is warranted that reflects that lifetime together. Flowers were my first thought and so I pulled out Jar of Love and started by creating a watercolour background using reinkers. It ended up with a lovely worn feel and is much more luminescent in real life. For the panel on top I stamped up a bunch of branches and flowers and created a bouquet to come out of my shaker jar (I included a few heart sequins in there if you look carefully). A little tag, a scatter of sequins and a liberal dose of Wink of Stella finish it all off.

I know Mum and Dad will like it regardless and while I was uncertain for a while if it was going to turn out ok I think it did in the end.

Hope you can join us this week. The rest of the team have lots of fabulous inspiration to get you going so do check them out!

Thanks for visiting,
Kim

Recipe: All SU! unless otherwise noted
Stamps: Jar of Love, Express Yourself (R)
Cardstock: Real Red, Whisper White, Basic Black
Ink: Real Red, Melon Mambo, Flirty Flamingo, Marina Mist, Tuxedo Black (Memento), Old Olive, Garden Green, Versamark
Accessories: Everyday Jar Framelits, Tiny Tags dies (Papertrey Ink), Number Time Trio dies (PTI),  White and Clear embossing powder, Red glimmer paper, Stacked with Love DSP (R), Window sheet, Assorted sequins - SU! and Pretty Pink Posh, Memento 0.3 marker, Fine Tip glue pen, Dimensionals, Tear and Tape

Friday, February 12, 2016

JAI #298 Just add V


Hello there,
well a certain romantic date is creeping up on us at the moment and at Just Add Ink we wanted to give you the option to make a little something special for that special some one or not! How's that? Well this week Tina suggests you Just Add V. "V"? Well that means theme your project around things beginning with V. If you want to go the romantic road - then - Valentine's, but you can equally theme it around the colour Vanilla, other things I can think of include Vampire (if you want to get an early start on Halloween), Vacation, Video, Volcano, Vine and Vegetable.

Not only is it Valentines Day but our wedding anniversary is coming up soonish - so I made something that will do double duty!


A couple of shots to show how the heart can spin around the world!


A CAS inside.

I kept this CAS - always better for masculine cards. I let the DSP do all the work for me and added in a fun interactive element. My first go at a round spinner. It does work - perhaps not perfectly - but I think it will be enough to bring a smile to my DH's face.

So what can you think of that follows our "V" theme. We'd love to see! Don't forget to go and check out the rest of the JAI DT for some fun inspiration.

Thanks for visiting,
Kim

Recipe: All SU! unless otherwise noted
Stamps: Going Global
Cardstock: Basic Black, Very Vanilla
Ink: Tuxedo Black (Memento), Versamark
Accessories: Going Places DSP, Circles Collection framelits, Hearts collection framelits (R), Red glimmer paper, Gold embossing powder, Linen thread, Dimensionals, Double sided tape (X Press)

Friday, October 9, 2015

JAI #283 Just add a sketch

Hello there,
this week at Just Add Ink we have a sketch for you from Narelle. It's got some classic lines that I thought would be perfect for my parent's wedding anniversary. This year they are reaching 49 years! The nice thing is that our family is always together for this event each year as it's right before Christmas (yes I'm doing a bit of planning ahead here :).
Here's the sketch.
And here is what I made of it.


Dad often gives Mum red roses so I decided to go with that theme this year. Using red and mixing it with earthy kraft and some softening vellum. As you can see I did make one small change to the sketch pulling the horizontal element from the back to the front of the layers. To add some mobile pops of colour I tucked some red sequins in under the vellum, stitching them in. The inside was finished off with another little red rose.

Don't forget to check out the rest of the DT's fabulous projects. Hope you will join us for the sketch this week.

Thanks for visiting,
Kim

Recipe: All SU! unless noted
Stamps: Botanical Blocks (PaperTrey Ink), Year of Flowers Collection (PTI), Round and Round (PTI)
Cardstock: Real Red, Kraft, Whisper White
Ink: Real Red, Cherry Cobler, Old Olive, Garden Green, Versamark, Tuxedo Black (Memento)
Accessories: Brights DSP stack (R), Copics, Sheer Basic Patterned Paper Vellum (PTI), Double ended banner  die (PTI), White embossing powder, Moonshine sequins (Simon Says Stamp), Fine Tip glue pen, Double sided tape (X press)

Friday, November 28, 2014

JAI 242 Just add inspiration


Hello there,
I'm pretty sure I said life was busy last week and I have to admit it hasn't gotten any quieter in the past week. I did spend the absolutely stinking hot day we had (38 oC) over the last weekend inside - but not crafting :( Instead I had to spend the day doing the annual paperwork organise - ick! I did manage (somehow!) to sneak in the odd moment to craft and so we come to this week's Just Add Ink challenge. This week we want you to Just Add Inspiration from this vibrant picture combo that Trish put together for us. Use the pictures to inspire your project - it may be the flowers or the colours, patterns, just one of those - or all! Here it is.

And here is what I made of it.


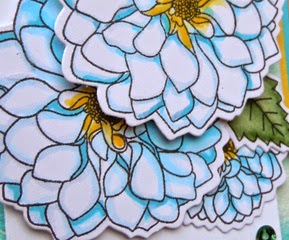
I loved the bright colours, in fact I think it would be hard to find more happy cheerful colours. I wanted to retain the bright intense warmth and well the flowers too! So I went through my flower stamp collection and found to my shock and horror - a decided lack of daisies - really how could I have let that happen - lol! So I went with some dahlia's instead. Starting with a watercoloured background for the base (still loving this technique at the moment) and then pulled out my alcohol markers to add some shading to the flowers on the tag. I did try initially (but not for long) to keep it down to one flower on the tag but when it comes down to it I love layers - so more flowers it was :)

Hope you can join us this week. Do check out the rest of the DT for beautiful inspirational projects.

Thanks for visiting,
Kim

Recipe: All SU! unless otherwise noted
Stamps: Delightful Dahlia (PaperTrey Ink), Fillable Frames #4 (PTI)
Cardstock: Tempting Turquoise, Whisper White, Daffodil Delight
Ink: Tempting Turquoise, Island Indigo, Versamark, Tuxedo Black (Memento)
Accessories: Basic Bookmark 2 die (PTI), Delightful Dahlia die collection (PTI), Copic markers, watercolour paper (non SU!), Daffodil Delight satin ribbon (R), Crushed Curry baker's twine, 2013-2015 In Color sequin assortment, Dimensionals, Double sided tape (X press)

Friday, May 2, 2014

JAI 213 Just Add Inspiration

Hello there,
can you believe its already May!! This year is flying past. Right now is one of my favourite times of year because of the beautiful Autumn colours that are everywhere. Just seeing those jewel bright colours contrasted against the blue sky makes me happy :)

I have to say that the challenge we have for you at Just Add Ink this week is one that made me happy too. This week its an inspiration challenge - pick what inspires you from the picture - patterns, colours and go have fun!


And here is what I came up with for my in-laws 50th wedding anniversary. 


One to show you the fabulous shimmer and shine.


The inside.


The inspiration picture was just perfect for celebrating such a special family occasion. Gold adds such richness and of course Gold = 50 years. How perfect was that! I loved the detail the chevron adds and I pulled the pink and blue from the photo to represent bubbly bubbles, and love that it also represents the two halves of their long partnership. 

I'll also confess it to being the first time I've used a tiled panel, it just seemed perfect for this!

Hope you can join in the fun. Do check out the rest of the JAI DT for wonderful inspiration.
Thanks for visiting,
Kim

Recipe: All SU! unless otherwise noted
Stamps: Positively Chevron, Memorable Moments, One in a Million
Cardstock: Whisper White, Pool Party, Blushing Bride
Ink: Versamark
Accessories: Starburst framelits, Banner punch (R), Gold Foil sheet, Circle punches (1/8",1/4" 3/8" (Itty Bitty Shapes), 1 3/4"), Gold Baker's twine, Vintage faceted designer button, Gold embossing powder, Dimensional, Double sided tape (X Press)

Friday, February 7, 2014

JAI 201 Just add a colour combo

Hello there,
has February crept up and caught you by surprise? Well just in case it has we have a challenge lined up that will help you get that Valentines Day card made on time! This week at Just Add Ink our challenge is to Just Add a Colour Combo. Here's the colours.


And this is the card I made for my hubby - for our anniversary rather than Valentine's Day.


It was sooo hard to restrain myself from adding more to this - but I always have to remind myself when I'm making guy cards to go easy on the fussy details. So I kept the detail in this one limited to the soft layered hearts, a tiny wee sparkly heart and a small twine bow.

Thanks for visiting and do check out the rest of the DT for fab colour combo inspiration.
Kim

Recipe: All SU! unless otherwise noted
Stamps: Hearts a Flutter, Pure Innocence Flower Girl (My Favorite Things), Love Lives Here Holiday (PaperTrey Ink), Confetti Garland Borders (PTI)
Cardstock: Island Indigo, Pool Party, Whisper White
Ink: Pool Party, Sahara Sand, Real Red
Accessories: Banner punch, Hearts collection framelits, Owl builder punch, Linen/Canvas impression plate, Red Glimmer paper, Piercing mat and tool, Cherry Cobler bakers twine, Dimensionals, Double sided tape (X Press)

Friday, November 8, 2013

JAI 190 Just add masking

Hello there,
You know how things just stick in your head sometimes - well I knew I had seen a favourite blogger of mine - Betsy Veldman do a special masking technique. I chased up the memory for this weeks Just Add Ink challenge. Why? Well cause it was a rather cool idea and this week the challenge is to Just Add Masking. You can find the link to Betsy's tutorial here (on Nicole Heady's blog) and here is my take on it.


One of the things I think is so interesting about this is how you can create so much depth and still have a single layer. Of course I couldn't resist adding a popped up flower to frame the sentiment. I also used some more traditional masking to add in the leaves on the front.

I'm pretty sure I'll revisit this technique. Thanks for visiting and don't forget to check out the rest of the DT for lots of masking inspiration!

Kim

Recipe: All SU! unless otherwise noted
Stamps: Rosie Posie, Fillable Frames #1 and #4 (PaperTrey Ink)
Cardstock: Winter Wisteria, Rose Red, Whisper White
Ink: Winter Wisteria, Rose Red, Garden Green, Crumb Cake, Basic Black
Accessories: Rosie Posie dies (PTI), small heart punch, Linen/Canvas impression plate (PTI), Crumb Cake seam binding, Winter Wisteria ruffled ribbon, Linen thread, Jewels - rhinestone, Dimensionals, Double sided tape (X Press)

Friday, March 1, 2013

JAI 155 Just add a sketch


Hello there,
welcome back for a new Just Add Ink challenge. This week we have a sketch for you.

I had one of those eureka moments when I was thinking about this sketch. I wanted to make an anniversary card for my DH (we clocked up a significant anniversary this year). I also wanted to play with letters and negatives and I suddenly realised I could make the tabs in the sketch work with the whole idea of an arrow (love=heart=arrow!!!). This is how it all turned out.


It was just shear luck that the placement of the U on the BigZ die was in just the right place that I could cut it out as a negative at the bottom of my DSP panel - sometimes you do get lucky :). I let the letters do the talking on this one just adding lots of subtle detail (impressing/embossing texture onto much of the layers).

Do go check out the rest of the DT for some fabulous inspiration for this great sketch!!
Thanks for visiting,
Kim

Recipe: All SU! unless otherwise noted
Stamps: none
Cardstock: Real Red, Whisper White, Basic Black
Ink: None
Accessories: Typeset Alphabet BigZ, Timeless Type Alphabet Sizzlet (R), Heart Collection Framelits, Fashionable Hearts Embosslits, Linen and Canvas Impression plate (PaperTrey Ink), Get to the Point die (PTI), Summer Smooches DSP, Pure Poppy vintage button (PTI), Charcoal bakers twine (The Twinery), Double sided tape (X Press), Dimensionals


Wednesday, December 22, 2010

Happy Days


Morning all,

I'll try and make this one a quick one - we have another busy day ahead - I'm really looking forward to some relaxing over Christmas though. I needed a card for my Mum and Dad for their wedding anniversary - it'll be 56 years Thursday - so this year I went a little vintage (ish).


I started by stamping my car on some Newsprint DSP and also onto Very Vanilla cardstock. Trimmed out some of the Newsprint sections and added them to the Vanilla base. Added some colour for the wing mirrors and bumper bar. Then I added a stamped number plate. I also added some half pearls for the headlight - I love the glow you get from them - very appropriate - and it also means I can add my card to the current Passion for PaperTrey challenge (add pearls) hi ladies :). I cut my car out with a circle nestability, off centre, and added a scalloped mat. For the base of the card I started with Riding Hood Red, then a layer of Basic Black, then the top layer was Very Vanilla, which I impressed with the Bookprint impression plate. I added some restrained sponging around the Vanilla layer in Riging Hood Red. To finish off the front I stamped the sentiment, curved to fit around the car element, add some ruffled ribbon, and a vintage brad. This was my first time to crack these open (love them and have been hoarding) but for Mum and Dad - well only the best! The inside I finished off with the same layering added a central sentiment element that seem to tie in with the anniversary them " Live, laugh, love".

Thanks for visiting in this busy Christmas season :)
Kim

Recipe:All SU! unless otherwise noted
Stamps: Enjoy the Ride (PaperTrey Inc), Round and Round (PTI)
Cardstock: Riding Hood Red, Basic black, Very Vanilla
Ink: Riding Hood Red, Basic Black
Accessories: Bookprint Impression plate (PTI), Classic and scalloped nestabilites (Spellbinders), Scalloped oval punch, Word Window punch, cream half pearls, Riding Hood Red taffeta ribbon (R), Ribbon Originals (R), Vintage brad, Aquapainter, sponge dauber, Dimensionals, Double sided tape


Tuesday, March 16, 2010

Side by Side

Hi there all,

well this is a surprise - I had pretty much decided to not to do a challenge this week, and may'be post one of the cards from my workshop last weekend. It was a combo of just plain tired out from late nights stamping plus just on the night when I was planning on catching up on my sleep Mr Two came down with somethng nasty. Thankfully he is now on the mend and I finally got some sleep last night. With some sleep returned my mojo and urge to stamp. I liked the colour combo for Makeesha Byl's challenge (hosted by Chantelle this week)


and I had a new set that tickles my funny bone, I wanted to ink up - so I decided to cave in while Mr Two was having his nap today (only 40 mins long the little devil) - but it was just enough time. I needed an anniversary card to give to my hubby in a couple of weeks and this is the result.


I started with a Choc Chip base cut A frame but then turned it onto its side. Then cut a white mat for it and picked two DSP patterns (from the long retired Loves Me pack). The Regal Rose pattern was layered onto the LHS and the Teal pattern on RHS. I stamped two lounge chairs one onto each of the two DSP patterns and also a cushion. I trimmed them out and mounted them onto a panel of Whisper White, onto which I had already stamped the two chairs. I added the cushions colours reversed, a little chocolate brad for each. Stamped the sentiment in Chocolate Chip above the chairs and mounted the whole panel on a Chocolate Chip mat and then dimensionals. The last touch was a strip of knotted wide Choc Chip grosgrain ribbon running underneath the image panel.

I haven't finished the inside yet - Mr Two woke up!! but have it all planned in my head, something simple and not too girly since it is for my hubby. I was very happy with the result not sure if hubby will find it funny or if he will be horrified that it signifies oncoming old age (lounge chairs for an anniversary card ?)- perhaps you can tell me if you think its appropriately "romantic" or not?

Thanks for visiting,

Kim

Recipe: All SU! unless otherwise noted

Stamps: On my Couch (PaperTrey Inc)
Cardstock: Chocolate Chip, Whisper White
Ink: Chocolate Chip
Accessories: Loves Me DSP (R), brown brads (Bo Bunny), 1 inch circle punch, wide Chocolate Chip grosgrain ribbon, dimensionals, SNAIL adhesive, double sided tape.


Monday, January 18, 2010

An Amethyst Anniversary


Hi there,

I had two key inspirations for this card. Firstly I saw a striking card by Nancy Riley using this tent card format – that was the first time I really remember seeing a card like this. BTW I loooove that Dasher stamp – sadly we don’t have it here in AUS. The other inspiration was this card by Kirsty Brown, I really loved how she combined Upsy Daisy with Pocket Silhouettes.

So this card was my take on combining these two inspirations and it was for a special occasion, my Mum and Dad’s anniversary. This was a 50+ years anniversary for them – so they are well and truly beyond Amethyst but I used some artistic licence with the title.

A side view that gives you a glimpse of the inside

I started by looking up the tent card tutorial on Splitcoasters. I decided to go with a combo of (predominantly) Almost Amethyst and Close to Cocoa. So I cut a base of Almost Amethyst, (scalloping the bottom front edge prior to cutting the final length) and layered that with some Amethyst DSP from a promo pack in 2008 (?). The final touches to the base was some lovely wide retired Choc Chip satin ribbon (but I always felt that the colour was a better match to Cocoa). I’m not a big bow person but I decided to try and I must admit it did look nice. The final touch to the base was to stamp the sentiment, in Choc Chip, direct onto the Amethyst in DSP- I wanted it to be clear but not dominate the card – the top image panel is really what I wanted to feature.

OK now the image panel. I coloured direct to rubber with my markers for the Upsy Daisy stamp. Close to Cocoa for all the stems, a layer of Almost Amethyst over the flowers then highlights with Lovely Lilac, I blended those two colours using a blender pen. Then a lot of huffing on the stamp later I stamped it on Whisper White. To give it a setting I stamped one of my Pocket Silhouette stamps repeatedly below. I did stamp, the Close to Cocoa ink off once each time before stamping – so they didn’t over power the Upsy Daisy image. The finishing touch was to add a butterfly to fly above the flowers. So I inked up my butterfly in Almost Amethyst gently rock and rolling the edges in Lovely Lilac and stamped it on Whisper White. After punching it out, I was able to attach it using dimensionals, adding a purple rhinestone on the body to just bling it up a little. Having stamped the image I got out my circle nestabilites selected about the biggest size that would be appropriate for the top of the tent card (remember it has to fit in a standard card envelope). I cut the image out, then added a plain frame (I did do this before adding the butterfly!) in Close to Cocoa and then finished with a scalloped circle border in Almost Amethyst.

I was really happy with how it turned out, and importantly Mum and Dad liked it too!

Thanks for visiting,

Kim

Recipe: All SU unless other wise noted
Stamps: Upsy Daisy, Pocket Silhouettes,
Cardstock: Almost Amethyst, Close to Cocoa, Whisper White
Ink: Almost Amethyst, Lovely Lilac, Whisper White, Close to Cocoa, Chocolate Chip
Accessories: Circle nestabilities (standard and scalloped), wide satin Chocolate Chip ribbon (R), Scalloped Edge punch, Almost Amethyst DSP, Purple rhinestone (Kaiser), dimensionals, SNAIL adhesive.