Showing posts with label Turning a New Leaf. Show all posts

Friday, April 8, 2016

JAI #306 Just add sympathy


Hello there,
well we have just about made it out of the cough zone at home. Just in time for school holidays too. Since my stamping time tends to get contracted during the holidays I have been trying to get ahead with some projects and this week's Just Add Ink challenge from Jan - to Just add Sympathy was first on the list. Sadly I will more than likely need to use this one this year as a long term family friend is struggling with cancer :(


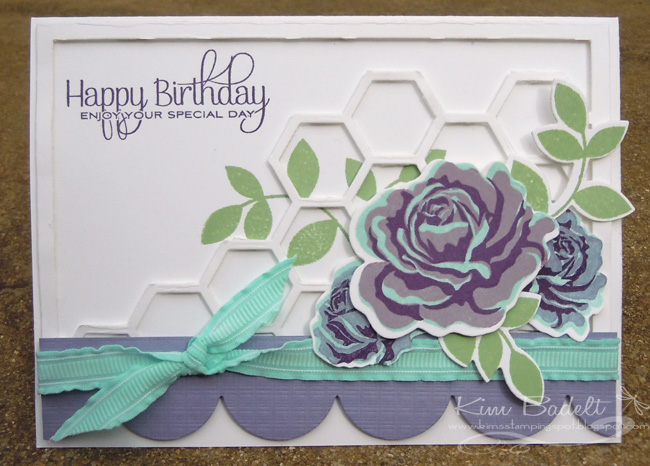
I started by having a bit of a rummage through Pinterest for sympathy cards and discovered from that, that what appealed to me was lots of white and a little touch of green. So that's where I started. I also liked the idea of incorporating the sunburst die and decided to double layer it (the top layer is Shimmer White) to give it greater presence. Then I softened the strong lines by using vellum foliage. Knowing I will have to use this does make me sad but I'm also glad that I'm prepared.

Sympathy cards are tough to make and tough to give but are important to provide comfort and support to those who have lost someone they loved.

Hope you can join us. Please do check out the rest of the DT for some wonderful inspiration.

Thanks for visiting,
Kim

Recipe: All SU! unless otherwise noted
Stamps: Turning a New Leaf (PaperTrey Ink), Sending You (PTI)
Cardstock: Whisper White, Shimmer White, Basic Gray, Vellum
Ink: Pear Pizzazz, Basic Gray
Accessories: Circle framelits, Sunburst thinlets die, Turning a New Leaf dies (PaperTrey Ink), Doubled ended banner dies (PTI), Linen thread, Dimensionals, Tear and Tape, Staples

Friday, June 14, 2013

JAI 169 Just add inspiration

Hello there,
well we have a fun challenge for you this week at Just Add Ink -  a gorgeous Just Add Inspiration photo. Funnily enough what it reminds me of is the sunrises I'm seeing out the kitchen window (well some days anyway), as I get the kids lunch boxes and breakfasts prepared in the early hours of the morning. My reward after all that's done is a big cup of fragrant Earl Grey tea - yummmm and a daily pinterest catch up :) Here's the inspiration photo.
And here's what I came up with. A birthday card for a friend who lives far across the ocean. May'be even the one in the photo!


It was the graduation of colour and the black that really struck me about the image. Having decided I would use a white base that meant black foliage. To bring the colour in I die cut layered delicate flowers that followed the colour transition in the inspiration image.  Then blinged them up with some shimmer spray and rhinestone brads. Embossing the sentiment in black on the Pure Poppy cardstock brings in a bit of that black against colour effect from the picture and a scattering of coloured rhinestones finished it all off. 

Where will the picture take you? Hope you can join us this week at Just Add Ink and find out :)

Thanks for visiting,
Kim

Recipe: All SU! unless otherwise noted
Stamps: Turning a New Leaf, Fillable Frames #1 and #11 (PaperTrey Ink)
Cardstock: Poppy Parade, Calypso Coral, Tempting Turquoise, Elegant Eggplant, Basic Black
Ink: Basic Black, Poppy Parade, Versamark
Accessories: Bloom Builder # 3 die, Fillable Frame # 11 die, Linen and Canvas impression plate (PTI), Black embossing powder, Frost White shimmer paint, Clear rhinestone brads (R), coloured rhinestones (Kaiser), Dimensionals, Double sided tape (X press)

Friday, August 24, 2012

JAI 132 Just add a sketch


Hello there!
well this week at Just Add Ink we have a sketch for you. It turned out to be perfect for the idea I had for a birthday card for a friend. Here's the sketch.
And here is the end result of sketch plus playing with some new stamping goodies ;)


The colour selection was decided based on colours that I thought my friend would like, they make for some unusual roses but definitely striking ones! It was (and will be) interesting to play with other colour combos using this set and see how the roses turn out. I played around with two mid purple shades - Wisteria Wonder and Perfect Plum. In the end the large rose on the front was stamped with Wisteria and the two smaller ones tucked underneath with Perfect Plum. I also played with a bit of under over foliage. I saw someones work on Pinterest that played with this idea and had been itching to try it out for myself. The colours and all the white give it a really fresh feel - almost summery - or is that wishful thinking on my part as it almost snowed here a week ago ;) All the early spring tree blooming however does give me some hope we are nearing the end of our winter! Anyway hope you get the chance to give the sketch a try this week!

Thanks for visiting :)
Kim

Recipe: All SU! unless otherwise noted
Stamps: This Sweet Life, Beautiful Butterflies, Turning a New Leaf (all Papertrey Inc)
Cardstock: Whisper White, Wisteria Wonder
Ink: Pool Party, Wisteria Wonder, Perfect Plum, Elegant Eggplant, Wild Wasabi
Accessories: Hexagon die: Coverplate, This Sweet Life dies, Turning a New Leaf die, Large Scalloped border, Linen/Canvas Impression plate (all PTI),  Pool Party ruffled ribbon, Dimensionals, Double sided tape, SNAIL adhesive

Friday, February 17, 2012

JAI 105 - Just add a colour combo

Hello there,
not much crafting going on at moment as I was busy last weekend surviving my Mr 4's birthday party - the most hair raising momment was when one of the rocketship cake's thrusters (=sparkler) actually burnt a hole in the tablecloth!!! Now I just need to survive Miss 7's party next weekend and then I can get back to some crafting again. Luckily I prepared for this weeks Just Add Ink challenge ahead of time - this week we have a colour combo for you. Here it is.

Something flowery was my starting point and I used surprisingly less Pool Party that I had originally planned but that was just the way it worked out - funny how some cards evolve on you!

So basically I just started by stamping a background pattern using the leafy foliage and then adding in flowers and finally filling some little spaces with the little Pool Party dots. Once the background was done I added a glittered strip across towards the bottom and then contructed my sentiment focal point. For this I layered a stamped and impressed die cut with a stamped decorative label. Added die cut foliage to either side, embellished those with rhinestones and added some threaded buttons to either side of the sentiment. I was pretty happy with it once it was all done but it did take some fiddling and an intermission of a day or two ;) to think about how to finish it off!

Thanks for visiting - hope you get the chance to play along with us at Just Add Ink this week!
Kim

Recipe: All SU! unless otherwise noted
Stamps: Four Frames, (Turning a new leaf, Flower Fusion 7, Simple Sunflower, Love Lives Here: Holiday - all PaperTrey Inc)
Cardstock: So Saffron, Wisteria Wonder, Whisper White
Ink: Certainly Celery, Wisteria Wonder, Pool Party, So Saffron, Concord Crush
Accessories: Turning a new leaf dies (PTI), Fillable frame #10 die (PTI), Linen/ Canvas impression plate (PTI), Decorative Label punch, Plum Pudding vintage buttons (PTI), Corner rounder punch, Sticky strip, Dazzling Diamonds, Jewels - rhinestones, Whtie ribbon (craft shop), Dimensionals, Double sided tape (X Press)

Wednesday, February 16, 2011

Make it Monday 2 - Sympathy


Hi there,

today was one of those rare days when I HAD to make a card, sadly it is one to send to my cousin whose mother just recently passed away. My auntie was a really special lady and will definitely be missed by the family!

I haven't made many sympathy cards (thankfully) but I knew I wanted to keep it simple and not too somber. The design was heavily influenced by Nichole Heady not any specific card but just the general style and design. I also incorporated the new Make Monday challenge see below for details.


So I started with a Chocolate base, layered that with a panel of Confetti White (SU!), which I then impressed with the Linen and Canvas plate, I also rounded all the corners. At the mid point I added some double sided tape and then added a strip of patterned paper that I had crumpled up and then "ruffled" into folds. Using brown thread I used my sewing machine to secure and accent the paper ruffle. For the focal point I used a Chocolate Mat stack 4 (impressed with Bookprint impression plate), layered that with a Mat Stack 1 (from Confetti white) stamped a frame, then added a stamped off leafy branch. Over the top of that I added a strip of vellum, and stamped the sentiment (yes I have finally got to the Make it Monday 2 challenge - added a vellum sentiment strip). I secured the vellum with a small strip of scor tape and then added buttons, threaded with linen thread to accent the central panel. the inside was finished off very simply to match.

Thanks for visiting,
Kim

Recipe:
Stamps:
Mat Stack 1 collection, Turning a New Leaf, Through the Trees (PaperTrey Inc)
Cardstock: Chocolate Chip, Confetti White, Vellum (SU!)
Ink: Chocolate Chip, Always Artichoke, Early Expresso
Accessories: Mat Stack 1 and Mat Stack 4 dies (PTI), Linen and Canvas impression plate, Bookprint impression plate (PTI), Turning a New Leaf patterned paper (PTI), Ripe Avocado buttons (PTI), Corner rounder punch (SU!), Linen thread, Double sided tape (X press), SNAIL adhesive (SU!), Scor Tape, Tombow Multi, Dimensionals (SU!), sewing machine

Thursday, January 13, 2011

Just Add Ink 51 - Just Add Monochrome


Hi there,

how did you go with the Just Add Ink colour challenge last week ?? I saw some awesome entries as I was browsing through the entries. Ok we have a new challenge for you this week and its also about colour - Just Add Monochrome. I do tend to migrate to greens and blues so I knew it was going to be one of them but which one. In the end I couldn't get green out of my head so this is what I did with it.


I started by inking up my large leafy stamp in Certainly Celery, then rock and rolling it in Old Olive. Then I carefully trimmed it out. I wanted a feature panel for the leafy branch to spread across, and then DSP behind that. So I set to work sorting out the layout and layers. In the end I settled on a crosshatched pattern from the Celebration DSP. I couldn't resist adding some Celery and Old Olive buttons to embellish the branch, and to the striped Old Olive grosgrain. The inside was just simply stamped with another rock and rolled branch like the front to finish it off.


Ahh I love greens and I do really like this card - yippee :)

Thanks for visiting,

Kim

Recipe: All SU! unless otherwise noted
Stamps: Vintage Label (R), Turning a New Leaf (PaperTrey Inc)
Cardstock: Certainly Celery, Old Olive, Whisper White
Ink: Certainly Celery, Old Olive
Accessories: Bright and Subtles buttons, Striped Old Olive grosgrain ribbon, Celebration DSP, White embroidery thread, Dimensionals, SNAIL adhesive, Double sided tape (X Press)

Tuesday, August 24, 2010

Inkspirations 35 - Its a girl


Hi there,

welcome back - it's another week and time for another Inkspirations challenge. This week Keesh posted a truly lovely colour combo and I was really looking to have a play with it. Here's the colour pick.


Having looked forward to working with these colours would you believe I struggled! I changed the layout, I looked at every scrap of light pink DSP I had a hundred times (only a slight exaggeration), fiddled and changed my mind. In the end I decided it was incorporating the chocolate chip that I was struggling with. Finally I found a way and I also settled on a layout - flipping this weeks Sweet Sunday sketch.


Here's the result.


OK the final version ;) started with a Rich Razzleberry base, layered that with Whisper White to lighten the colours, then layered that with some Choc Chip DSP. Having worked out where my butterfly was going to be I could stamp my flourish flight trail. I inked up my leafy flourish in versamark and then choc chip and stamped it then embossed with clear embossing powder. Next having picked some Pretty in Pink dotty DSP I layered the two panels onto Razzleberry. Rounded a few corners and stamped the sentiment at the bottom of the long panel. The final piece is the butterfly feature - I stamped some Razzleberry dots onto Pretty in Pink, then punched out a butterfly. To fancy it up I added a wire body and big curly antennaes (I got this idea from a lovely card a special friend of mine made me for my birthday last year - you can see it here), and lastly added a rhinestone brad to bling it up a bit. The butterfly was mounted on dimensionals above a mat of white and Razzleberry circles. The inside was finished off simply to match.

It's not my favourite card of all time but I think it turned out quite nice in the end - and one I hope is suitable for greeting a baby girl to the world which is good as my beautiful little niece arrived this morning:)Welcome to the family baby girl!

Thanks for visiting,
Kim

Recipe: All SU! unless otherwise noted
Stamps: Flight of the Butterfly, Turning a New Leaf, Baby Button Bits
Cardstock: Rich Razzleberry, Whisper White, Pretty in Pink
Ink: Rich Razzleberry, Pretty in Pink, Chocolate Chip, Versamark
Accessories: Loves Me DSP (R), Berry Bliss DSP (R), Butterfly punch, Circle nestabilities, Rhinestone brad, Jewelery wire (local craft shop), Clear embossing powder, Sticky Strip, Dimensionals, Double sided tape, SNAIL adhesive.

Tuesday, June 1, 2010

Little sweet pea - Inkspirations # 25


Hi everyone,

well finally today marks the return of regular programming!! I had a wonderful time at convention met so many people (still have so many to meet) but more about that in another post. Hopefully I will also be able to post my swaps this week so I'll give you a run down then. The end result was I came home, happy and tired and have spent all week playing catch up (well I guess that's what happens when Mum goes off to play for the weekend!).

Anyway I was really delighted to get back into creating (since for the previous few weeks I had been flat out just putting together my swaps. Some friends are expecting a baby boy imminently so I wanted to make a baby card for them, and luckily for me Keesh's Inkspiration
challenge this week was a lovely sketch that was just perfect for what I had in mind. Here's the sketch.

And here is my card.

A side view to show the embossing

And the inside


As the Dad to be's profession is as a horticulturist I wanted to use something that referenced that - I had just the perfect stamp in mind for it. I started by stamping my pea pod image in Old Olive on Whisper White twice, one I cut out with the circle scissor plus, then cut mats for it in Certainly Celery and Bashful Blue. The second pea pod I trimmed out, so I could mount it above the first, after I had added three blue buttons to be the "peas". The circle mats were adhered to a card base, that started first with Bashful Blue, then Certainly Celery and then retired Spring Break DSP. I stamped (Versamark and Old Olive) and embossed some lovely leafy sprigs on the DSP so they would pop out from beneath the circle mats. To finish off the card I added some Basful blue ribbon and the sentiment, white embossed on Certainly Celery. The final touch some blue buttons thread with Old Olive cardstock, which had the ends curled.

As usual I finished off the inside simply to match the front.
I was quite pleased with how it came out - so what do you think? Is it a good baby card?

Thanks for visiting I'll be back back again soon I hope!

Kim

Recipe: All SU! unless otherwise noted
Stamps: Baby Button Bits (PaperTrey Inc), Turning a New Leaf (PTI), Studio Style (PTI)
Cardstock: Old Olive, Bashful Blue, Certainly Celery, Whisper White
Ink: Old Olive, Bashful Blue, Certainly Celery, Versamark
Accessories: Circle Scissors Plus, Word Window punch, Clear and White Embossing powder, Spring Break DSP (R), Spring Rain buttons (PTI), Bashful Blue stitched grosgrain ribbon, Tombow, Dimensionals, double sided tape.