Friday, June 29, 2012

JAI 124 Just add a colour combo


Hello there,
welcome back for a new Just Add Ink challenge. This week we have a colour challenge for you which I think you will find offers all sorts of possibilities - at least based on the variety of ideas the DT has come up with ;) Here are the colours.

The first thing that popped into my mind was to put together a Christmas card - but then I've spent the last couple of weeks designing Christmas cards for upcoming Christmas stamp a stacks - so that might have had something to do with it :)

I thought I'd make something fun for my niece and nephew, so I pulled out the truck from Loads of Love and made a spinner card (although mine is more of a slider!). You can find a tutorial here on how to put one together. To give the slider room to move the Marina panel is lifted up on dimensionals. The truck is attached to a little pull tab which you can use to move it along the length of the track. It's a little hard to see but I sponged the Marina panel with Whisper White to create some clouds and also added some snowflakes and a tiny bit of sparkle. My truck was coloured with copics, trimmed out and also finished with some sparkle. The last element was to add a couple of clouds - with more snowflakes - and some bling.

If my Mr 4's fascination is anything to go by I think his cousins will be delighted to receive this at Christmas time :)

Thanks for visiting,
Kim

Recipe: All SU! unless otherwise noted
Stamps: Loads of Love, Loads of Love accessories, Snow flurries (R)
Cardstock: Wild Wasabi, Marina Mist, Early Expresso, Whisper White
Ink: Whisper White, Basic Black, Marina Mist, Rich Cocoa (Memento)
Accessories: Punches (Scallop Oval, Large oval, Word window, Dotted scallop ribbon border, 1" circle), Cloud 1 and 2 dies (PaperTrey Inc), Woodland Walk DSP (R), Copics (C00, C1, C3, C5, C7, C9, E79, B12, B14, YG61, YG63), Subtles brad, Dazzling diamonds, Double sided tape (X Press), SNAIL adhesive, 2 way glue pen, Dimensionals (lots!)

Friday, June 22, 2012

JAI 123 Just add a sketch

Hello there,
well hopefully the week for you all has been less germ filled than mine. I'm hoping that by the time this post goes lives I won't be stuffed up and snuffly anymore and even more so hope that my Mr 4 has stopped coughing!! This week at Just Add Ink we have a sketch for you, it might take some thinking but it has alot of possibilities!

I started by flipping the sketch 90 degrees, viewed that way it made me think of a frame, with tags in the bottom right corner. Now why a frame? well that might have something to do with the recent acquistion of the SU! Notably Ornate set. I ummed and ahhed about this for months but in the end the appeal of the frame won out. Anyway here is the end result.

I started by stamping about 2/3 of the frame on the base, two flowers overlapping the frame and some scattered extra background detail. That done I impressed the base layer to add texture. Then I stamped the frame again, trimmed it out, sponged the edges and mounted that over the base. I also trimmed out several layers of flowers and white embossed an additional flower and layers.  Added all the flowers and layers in using dimensionals, and finished off the front with a couple of little tags. The inside was finished off to match. I must admit I really liked how this one turned out :) but I didn't have long to admire it as it went in the post straight away to a lovely stamping friend over in New Zealand (Hi Paula :).

Thanks for visiting and do give the sketch a try!
Kim

Recipe: All SU! unless otherwise noted
Stamps: Creative Elements, Notably Ornate, French Foliage, Tiny Tags
Cardstock: Cherry Cobler, Basic Black, Whisper White
Ink: Cherry Cobler, Basic Black, Crumb Cake, Whisper White, Versamark
Accessories: Jewelery Tag punch, Wrought Iron impression plate (PaperTrey Inc), White embossing powder, Cherry Cobler twine, Jewels - rhinestones, Sponge, Dimensionals, Double sided tape

Monday, June 18, 2012

Bon Voyage


Hello there,
it's not often that I find the time to do an extra post but I made the time to make a special card to farewell some old friends (namely Sam Post and family) so I figured I could find the time to post it as well. Also it's not often that what you envision in your head actually works out that way on paper but this one did - and that is something to smile about. These old friends are heading off to central Australia, which makes me think of wide expanses, strong colours and vibrant sunsets.

The whole heading off into the sunset idea ;) was probably influenced by a card I saw demoed at the recent SU! convention, and with those instructions still fresh in my mind making this didn't seem too daunting a task. Attacking my striped grosgrain ribbon, fraying it and adding the stripped off bits to the knot was another idea I brought home with me. (Any emu resemblence is purely coincidental but quite welcome and possibly appropriate ;)

Briefly, once I had established that my little car (stamped and then embossed) would fit snuggly into the 2 1/2" circle I could then make up a template on cardstock of all the radiating rays. I cut those apart and then dottoed them to the different colours of striped DSP. The colours from the centre out are Daffodil Delight, Pumpkin Pie, Tangerine Tango, Cajun Craze, Real Red, Cherry Cobler, Bravo Burgandy. Once all the DSP was adhered I put the whole layer through the Big Shot with the lattice embossing folder - hoping it was add a unifying texture to the panel. Then added my car and the ribbon and of course finished off the inside to match too :)

While I know that the car they will be using is just a bit bigger ;) than my little cutie, I kind of figured they would get the idea of where I was coming from and more importantly would know that we were thinking of them!

Bon voyage Sam - we'll miss you and the rest of the family!

Thanks for visiting :)
Kim

Recipe: All SU! unless otherwise noted
Stamps: Enjoy the ride, Postmarks (PaperTrey Inc)
Cardstock: Daffodil Delight, Basic Black, Whisper White
Ink: Basic Black, Real Red, Versamark
Accessories: Brights and Regals DSP pattern packs, Enjoy the ride die (PaperTrey Inc), Lattice embossing folder, 2 1/2" circle punch, Black embossing powder, acetate, Silver brads, 1 1/4 black striped grosgrain ribbon, Daffodil Delight, Pumpkin Pie and Real Red 1/8" taffeta ribbon, SNAIL adhesive, Double sided tape

Friday, June 15, 2012

JAI 122 Just add Delys Cram


Hello there,
welcome back for another challenge for Just Add Ink. This week we want you to... Just Add Delys Cram. Yes its time to CASE another one of the DT, Delys has a wonderful creative way with cards and her scrapbooking is just awesome! Go and have a browse through her blog and find a project that you'd like to CASE. I didn't have to go far to find something that made my fingers itch to get creating ;)   Firstly here is Delys card that I choose to CASE.


I really liked the layout on this card and what really caught my eye was how Delys used the new SU! edgelits. So off I went and this is what I came up with.
A simple inside using the remnant edgelit die cuts.
I stayed true to Delys layout but as you can see I changed the orientation and I decided to go with a pink and grey colour scheme. The putting together so to speak is pretty straightforward - but extra touches include sponging around edges,some paper piercing detail, colouring of the flowers, adding a couple of trimmed out extras on top for added dimension, and finally some little pearls to finish it all off.
Now I have one more card for you today that was also inspired by Delys card. But I have taken a much more stripped down approach and alot more license with the layout.
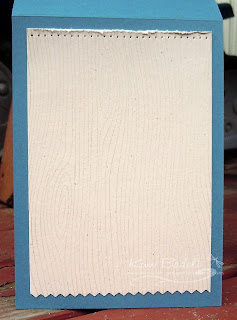
As you can probably guess this one is a card for a man - it's on its way to my FIL as I write this! The distressed DSP was my starting point for the woodgrain and colours. Then add in some piercing, pinking shear border, twine and a button and all done. This one was alot faster to put together than the girly version!!

So as you can see you can have alot of fun with this challenge :)
Thanks for visiting,
Kim

Recipe: All SU! unless otherwise noted
Card One
Stamps: Apothecary Art
Cardstock: Pink Pirouette, Basic Gray, Whisper White
Ink: Basic Black, Basic Grey, Pink Pirouette, Pretty in Pink, Certainly Celery
Accessories: Twitterpated DSP, Labels Collection Framelits, Edgelit Adorning Accents, Blushing Bride Pleated satin ribbon, Mat pack and piercing tool, Jewels - pearls, SU! button (R), embroidery thread, Sponge, Dimensionals, Double sided tape (X Press)

Card Two
Stamps: Woodgrain, Afterthoughts
Cardstock: Blue Bayou (R), Naturals Ivory
Ink: Blue Bayou (R), Cajun Craze, Crumb Cake
Accessories: Rugged DSP (Creative Memories), Woodgrain impression plate (Papertrey Inc),  Labels 2 (Spellbinder), pinking shears, Island Indigo twine, Regals button, Mat pack and piercing tool, Dimensionals, Double sided tape (X Press) 

Friday, June 8, 2012

JAI 121 Just add pearls

Hello there,
well I'm settling back into life after convention. I had a wonderful time meeting up with some special stamping friends and am already looking forward to seeing them again next year in Brisbane! I have some great new ideas to try out so hopefully some of those will make their way here over the next few weeks. But for today I can show you the new challenge from Just Add Ink. This week we want you to Just Add Pearls. Here's what I came up with.

I wanted to make a birthday card for a special stamping friend so I tailored the colours to something I knew she would like - hence the red and indigo. I also had a new blossom punch to play with ;) I started by inking the flower with markers, then layered that over two red punched blossoms, fixed it together with a brad then spritzing with glimmer mist and letting it dry. You get a great 3D effect doing this although that does make it tricky to post! But since I was hand delivering this one at convention I didn't have to worry about that. I used the flower as the feature and accented it with coordinating DSP, some lacey border detail, stitching and of course lots of pearls. The pearls are a subtle but I think really important finishing touch.

Do go check out the rest of the DT they will have some wonderful pearl adorned creations to inspire you!!

Thanks for visiting,
Kim

Recipe: All SU! unless otherwise noted
Stamps: Create a Cupcake, Mixed Bouquet
Cardstock: Real Red, Island Indigo, Whisper White
Ink: Real Red, Island Indigo
Accessories: Blossom punch, Corner rounder (SU!), Mat Stack 3, Mat Stack 3 layerz and Filigree border die (PaperTrey Inc), Twitterpated DSP, Ski Slope DSP (R), Frost white shimmer paint, Jewels - pearls, sewing machine, wide Real Red grosgrain ribbon (R), Dimensionals, SNAIL, Double sided tape (X Press)

Friday, June 1, 2012

2012 Convention Swaps

Hello there,
well I've been very happily occupied with attending the Australian/ New Zealand SU! Convention for the last day or two (big smile). In the lead up I was flat out trying to get swaps and a special little pressie for my fellow  JAI  design teammates ready. As a consequence I just didn't have the time do something for this weeks Just Add Ink challenge :( Luckily it was my "off" week. But do go to JAI and see what others on the DT have come up with for another great challenge. Since by now my convention swaps have been swapped I thought it would be a good occaision to actually post them! I made three different swaps. Here they are.
Made in three colour ways

Number two
Number three (this one was a re-creation I first blogged it here, for a JAI inspiration challenge)
In total I made 60 (not of each) and just finished them by the skin of my teeth. As to the little pressie's for my JAI teammates well I hope to blog that sometime soon ;)

Thanks for dropping by :)
Kim

Recipe: All SU!
Swap One
Stamps: Mixed Bouquet, Creative Elements, Apothecary Art
Cardstock: Early Expresso,Very Vanilla, (Pretty in Pink or Cherry Cobler or Marina Mist)
Ink: Early Expresso, (Pretty in Pink or Cherry Cobler or Marina Mist)
Accessories: First Edition DSP, Perfect Polka Dot embossing folder, (Blossom, Boho Blossom, Dotted Ribbon Scallop border) punch, Silver brad, Pretty in Pink satin ribbon or Marina Mist Scallop Dots ribbon or Cherry Cobler seam binding, Dimensionals, SNAIL, Double sided tape (X Press)

Swap Two
Stamps: Kindness Matters, Loving Thoughts, Apothecary Art
Cardstock: Crumb Cake, Basic Black
Ink: Basic Black, Versamark, Whisper White, Crumb Cake
Accessories:Labels Collection Framelits, Petal Cone Bigz die, Corner rounder (R), Gold embossing powder, Black satin ribbon, Gold brads, Sponge, Dimensionals, SNAIL, Double sided tape (X Press)

Swap Three
Stamps: Creative Elements, Clearly for You
Cardstock: Whisper White, Basic Black
Ink: Daffodil Delight, Pumpkin Pie, Tangerine Tango, Real Red, Basic Black
Accessories: Designer Frames embossing folder, Corner rounder (R), Jewels - rhinestones, Blender pen, Dimensionals, SNAIL