
Showing posts with label Stitched Shapes framelits. Show all posts

Friday, January 14, 2022

Just Add Ink #586 Blog Hop - Summer


Hello there and welcome to 2022 on the blog!
The Just Add Ink team are kicking off the new year with our annual blog hop.

You may have come from Rachael's blog, be starting the blog hop here on my blog, or you can go to Just Add Ink, and then follow the links at the end of each team members blog post on to the next. This year the theme is Summer.
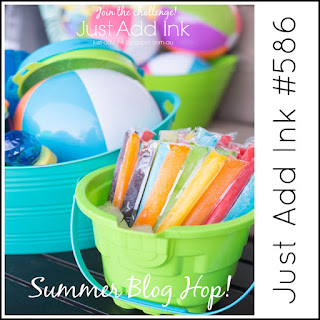


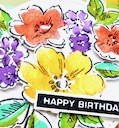
In Summer my garden is filled with colourful flowers, in fact many of the colours you can see in the challenge photo. So I wanted to reflect that in my project. Here's how it turned out.
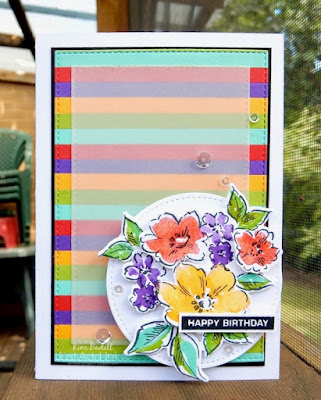
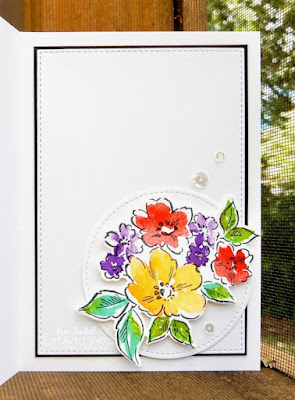


I decided to incorporate the linear icy pole element from the challenge photo in a colourful striped background, then mute it slightly with a vellum mat. The floral focal element then pulls all the colours from the background together. To add dimension I coloured three additional larger flowers from the floral image and mounted them over the base floral image. A swish of Wink of Stella and a scatter of sequins add sparkle.

Jan McQueen is next on the blog hop, so please go on and check out her lovely vibrant project, and then the rest of the team. Then come back and join in the challenge we'd love to see your 'Summer' project. 


Thanks for visiting,
Kim

Recipe: All SU! unless otherwise noted
Stamps: Hand-Penned Petals, Label Me Bold (R)
Dies: Penned Flowers, Stitched Rectangles, Stitched Shapes (R)
Cardstock: Mango Melody, Poppy Parade, Gorgeous Grape, Granny Apple Green, Coastal Cabana, Thick Basic White, Basic White, Basic Black
Ink: Mango Melody, Poppy Parade, Gorgeous Grape, Granny Apple Green, Coastal Cabana, Tuxedo Black (Memento)
Accessories: Wink of Stella, Fine tip glue, Dimensionals, Sequins (Pretty Pink Posh), Tear and tape, Big Shot die cutting machine (R)


Friday, March 5, 2021

Just Add Ink #544 'L'


Hello there,
it's time for another Just Add Ink letter challenge and this week Tina is asking us to Just Add 'L'. This means we want the main element of your project to be something that begins with the letter 'L'. It could be the sentiment - 'L'ove You, it could be a lamp, a lion or leprechaun, or a technique like letterpress or a card fold like a luminara or a lever card - the possibilities are almost endless...well as long as it begins with a letter 'L'!


I decided to go with lace as my 'L' element.


The bulk of the time spent in making this card was in the colouring. To no-line colour you need to stamp your line image as faintly as possible. Try stamping your image off once or even twice, and ideally use a colour of ink that will match/ blend in well with your fill colour palette. Then its all about the shading and ensuring you get enough contrast that the image has definition and isn't flat. I'm still working on that aspect of my colouring but overall I was pretty happy with how my blooms turned out. I used my coloured blooms to frame the sentiment and add a pop of colour, adding sparkle with a swish of wink of stella and gems. I wanted to keep the background as neutral as possible as all the detail was in the die cut lace pattern.

The Just Add Ink DT have many fabulous 'L' projects to inspire you, so please go check them out and then come back and join in the challenge.

Thanks for visiting,
Kim

Recipe: All SU! unless otherwise noted
Stamps: Band Together
Dies: Detailed Bands dies, Stitched Shapes framelits, Stitched Lace dies
Cardstock: Thick Whisper White (R), Whisper White (R)
Ink: Tuxedo Black (Memento), Blushing Bride, Granny Apple Green
Accessories: Blends (Granny Apple Green, Shaded Spruce, Magenta Madness, Melon Mambo, Poppy Parade, Real Red, Daffodil Delight, Pumpkin Pie), Wink of Stella, From my Heart faceted gems (R), Dimensionals, Fine Tip Glue, Tear and Tape, Big Shot die cutting machine (R)


Friday, December 11, 2020

Just Add Ink #535 Magical Creatures


Hello there,
I've only made a few Christmas cards this year but I've enjoyed the process (in all honesty my cards usually involve quite a process). This week I have one more for you, for this week's Just Add Ink challenge. This week Kelly has asked us to Just Add Magical Creatures. So get out your fairies, dragons, elves, gnomes or any other magical creatures you have!


I had to use my SU! gnomes for this - well one gnome anyway. 


Once I decided on using the Snowflake Splendour DSP all my colour choices were pretty much settled, and making that decision can be a really good way of getting yourself started on a project. I also decided to create an arched window, this turned out to be simple. First I die cut a circle from my DSP (that was added to the inside of the card). Using my trimmer I cut straight down from the widest part of the circle on each side and then made the final cut, parallel to the bottom of the card, to join the two side cuts. I created my scene and added my gnome and present which had both been glittered up with Wink of Stella and Shimmery crystal effects.

I was super happy with the end result :)

Please go and check out the magical projects of the rest of the Just Add Ink DT, then come back and join in the challenge.

This will probably be my last post for the year, as Just Add Ink will take a break till mid January soon. So I wish you all a Merry Christmas!

Thanks for visiting,
Kim


Stamps: Gnome for the Holidays, #Elfie (R)
Dies: Pine Woods dies, Stitched Shapes framelits, Rectangle Stitched framelits
Cardstock: Pacific Point, Highland Heather, Purple Posy, Whisper White
Ink: Pacific Point, Night as Navy, Tuxedo Black (Memento)
Accessories: Snowflake Splendour DSP, 1" circle punch, Sparkle glimmer paper (R), Blends (Highland Heather, Cinnamon Cider, Ivory, Basic Black), Copic Markers (to match pacific Point) Shimmery Crystal Effects, Wink of Stella, Dimensionals, Sponge brayer, Tear and Tape, Big Shot die cutting machine (R)

Friday, September 4, 2020

Just Add Ink #521 Inspiration


Hello there,
well what a change - last week we had snow flakes, this week we had beautiful warm spring days. I really enjoyed sitting in the warm sun streaming in through the windows putting together the pieces for my project. I decided the new challenge from Just Add Ink, this week to Just Add Inspiration from Rachael, was perfect for a Father's day card. Here's the inspiration picture.


And this is what I came up with.


From the inspiration picture I pulled the mix of textured copper, white, green and blue for my project. The key element to masculine cards is texture, lots of texture. So splattered, stitched watercolour base, embossed copper, embossed mountains, heat embossed moon, and wonderfully textured die cut trees - love these!  Combine all those together with some dimension and you get a colourful atmospheric masculine card.

The rest of the Just Add Ink DT have beautiful projects to show you so please go check them out and then come back and join in the challenge.

Thanks for visiting,
Kim


Project Recipe:To see and order any items used in today's project, just click on the items below to see them in my Online Store. You can order from me if you live anywhere in Australia. I would love to be your Demonstrator if you don't already have one. Please allow "Demonstrator contact" in your preferences so I can thank you properly when you place your order.


Retired/ Non SU!: Big Shot die cutting machine, Building Blocks (Papertrey Ink), white gouache