Friday, April 24, 2020

Just Add Ink #502 Sketch


Hi there, 
this week at Just Add Ink we have a sketch challenge for you from Tina. Here's the sketch.


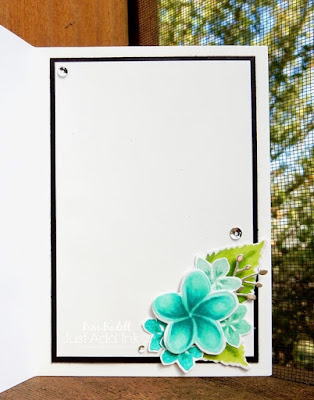
And here's what I came up with.


I wanted to make an old friend a birthday card, and her favourite colour is teal, as you can see there is plenty of that here! I haven't done a brayered background for a while so I started with that, then added lots of texture with water drops and white gouache splatters. Then I pulled out my SU! blends and no line coloured a large hibiscus bloom and some leaves. A sprinkle of softly stamped little flowers, the addition of lots of silver elements including sequins and wink of Stella finished it all off.

The Just Add Ink DT have lots of fabulous projects to show you so please go check them out and then come back and join in the challenge.

Thanks for visiting,
Kim 

Project Recipe:
To see and order any items used in today's project, just click on the items below to see them in my Online Store. You can order from me if you live anywhere in Australia. I would love to be your Demonstrator if you don't already have one. Please allow "Demonstrator contact" in your preferences so I can thank you properly when you place your order.


Product List
Blender Pens
$21.00


Retired SU! product: Birthday dies, Metallic sequins, Big Shot die cut machine

Friday, April 10, 2020

Just Add Ink #500 Blog Hop - Die Cut Word


Hello there, 
we are celebrating a big milestone at Just Add Ink this week, we have reached our 500th challenge! To mark this occasion the design team decided to celebrate with a blog hop. The theme for the blog hop, and for this week's challenge, is to Just Add a Die Cut Word, suggested by Jan.

To follow the blog hop you can begin the blog hop at Just Add Ink, here with me, or you may have arrived here from Patrice Easton's blog. Just click on the 'Next' button at the end of the post to take you on to the next blog hop stop.


Things are pretty grim all round the world at the moment and I really wanted to send a positive message out, and what better way to do that than using rainbow colours!


I pulled a retired SU! alphabet die set to cut and create my big rainbow die cut word. To make the letters really stand out I cut four of each letter and then glued them together. To pair with the rainbow 'happy' I coloured some flowers to match and tucked them around the letters. A simple black sentiment strip running over the top is actually the first part of the sentiment that is completed by the 'happy' underneath. Simple clean details like 
a stitched edge, subtle embossed background pattern, clear sequins and a some Wink of Stella finish the card off. Rachael Lewsley is the next stop on the blog hop, click the 'Next' button below to continue on to see Rachael's project. Thanks for visiting!


Project Recipe:
To see and order any items used in today's project, just click on the items below to see them in my Online Store. You can order from me if you live anywhere in Australia. I would love to be your Demonstrator if you don't already have one. Please allow "Demonstrator contact" in your preferences so I can thank you properly when you place your order.

Product List
Versamark Pad
$16.50
Heat Tool
$50.00


Retired or non SU! product: Big Shot die cutting machine, Large Letter framelits, Happy Birthday to You, Birthday dies (SU!), Building Blocks (PaperTrey Ink), Sparkling Clear sequins (Pretty Pink Posh)