Showing posts with label Detailed Deer thinlet dies. Show all posts

Friday, August 23, 2019

Just Add Ink #471 Inspiration


Hi all,
I had this card in my head for a couple of weeks and it was great to get it out and onto paper. Even better it turned out just how I wanted it too. Got to be pleased about that! All that thinking was inspired by this week's Just Add Ink challenge. This week Rachael is asking us to Just Add Inspiration. Use the colours, patterns, or objects in the inspiration below to inspired your project. For me it was definitely the transition of colours.


And here's how it came out.


Super simple this week, except for a bit of struggle with cutting the dies just the way I wanted them. The two deers are actually freestanding, but for the card I wanted them perched on the crest of a hill. In theory this type of partial die cutting is very simple, but my (warped cutting) plate kept slipping and I ended up with fully cut out deers (and some frustration on my part). 

Tip: you are want to leave the very bottom of their legs uncut so the deers are completely attached to the hill.

Eventually I got there, the key was using two flat cutting plates and then a little extra work with a part of sharp small paper snips.

To add a snowy/ starry night sky I first flicked water droplets, then a fine splatter of white gouache and wink of Stella.

The Just Add Ink DT have lots of fabulous projects to show you so please go check them out and then come back and join in the challenge.

Thanks for visiting,
Kim


Project Recipe:

To see and order any items used in today's project, just click on the items below to see them in my Online Store. You can order from me if you live anywhere in Australia. I would love to be your Demonstrator if you don't already have one. Please allow "Demonstrator contact" in your preferences so I can thank you properly when you place your order.

Product List


Retired SU!: Big Shot die cutting machine

Saturday, August 10, 2019

Christmas Deer


Hello there,
it's not often I pull something out of my unpublished archives but with no DT post live this week I decided this was a great chance to show you one of my felt projects, especially as the die I used is still current in the latest SU! catalogue. Using your dies to cut felt is no different than cutting paper, I use exactly the same sandwich as I do to cut cardstock. 

Each year I select a die and make a felt Christmas ornament for family and friends. Last year I knew it was going to be a deer! Here's some of my 2018 Christmas deer's. 


I used a mix of grey and brown pure wool felts (purchased off Etsy), and also mixed up the embroidery threads colours that I used, sometimes to blend in and sometimes to create a contrast. Mostly I used two strands of the six ply embroidery thread for the stitching.

To create your own, cut two felt deers, then start by stitching the antlers together. I used backstitch for my deers, that is a bit tricky on the antlers but you can always slip your needle between the two layers and come up in the new spot for next antler branch. Don't forget to add your little eye beads to each deer before begining the body. Next using backstitch I stitched the two deer layers together, making sure to stitch in the hanger, once you are about two-thirds of the way around push a little poly fill in using something small and pointy. Once you have gone all the way around reverse and fill in your back stitch. I finished off my deers using a little scrap of red felt as a scarf and some little silver bells (retired SU! from my stash). Then loop some thread through the hanger and you're done!

What I love about creating felt ornaments is that they are the kind of gift that keeps giving, as each year the recipient can hang this on their Christmas tree and get joy from it over and over again.

Thanks for visiting,
Kim


Project Recipe:
To see and order any items used in today's project, just click on the items below to see them in my Online Store. You can order from me if you live anywhere in Australia. I would love to be your Demonstrator if you don't already have one. Please allow "Demonstrator contact" in your preferences so I can thank you properly when you place your order.

Product List


Friday, July 12, 2019

Just Add Ink #465 The Season


Hello there,
the new Just Add Ink challenge this week will be perfect for you where ever you are in the world. This week Nikki is asking us to Just Add the Season. We want your project to be inspired by the season where you are, or your favourite season. Here in Australia it's winter and we're alternating between cold, clear blue skies to grey, cold and gloomy. Today was cold and gloomy so I was very happy to be typing this as I sat on the couch, layered in blankets with a hot water bottle for my feet!


Since it's also July I decided to pair winter with a Christmas in July theme and make my first official Christmas card for the year.


I was originally going to have a glimmer snow bank for my deer to be jumping from but as I thought about where I was going to put a sentiment I decided instead to create an ombre sentiment background to ground my deer. The stamparatus was absolutely essential for this, to align and re-align the sentiment, and align and re-align... you get the idea.  The texture was added to my brayered background, by flicking on water drops, wink of stella and then flecks of white gauche. Since my background was a single layer, I added some dimension by stacking my silver foil deer on three additional white deer die cuts. A little scatter of rhinestones finished it all off.  Stamping the sentiment background was fiddly but well worth the effort as I really loved how it turned out. 

The Just Add Ink DT have lots of wonderful projects to show you so please go check them out and then come back and join in the challenge.

Thanks for visiting,
Kim


Project Recipe:
To see and order any items used in today's project, just click on the items below to see them in my Online Store. You can order from me if you live anywhere in Australia. I would love to be your Demonstrator if you don't already have one. Please allow "Demonstrator contact" in your preferences so I can thank you properly when you place your order.


Product List
Stamparatus
$85.00


Retired SU!: Big Shot, white gauche paint 

Friday, November 23, 2018

Just Add Ink #435 Inspiration


Hello there,
there was a somewhat unplanned break for the blog as I've been busy. First, by meeting up with some of my fav stamping friends at Stampin Up's! OnStage event in Melbourne and then coming back to be swamped by work. I finally made it through to the weekend and was able to put ink to paper for the new Just Add Ink challenge. This week I have suggested we Just Add Inspiration, here's the picture. You can use the colour, patterns or objects in the picture to inspire your project.


And here is what I came up with - quiet woodland scene.


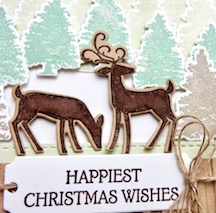
I kept the colours, subdued and closer to neutral bringing in some subtle green and warm grey tones. Then added my two deers front and centre in a little clearing. It turned just the perfect level of rustic and I think captures several aspects of the inspiration picture.

The Just Add Ink design team have lots of wonderful projects to show you so please do go check them all out and then come back and join in the challenge.

Thanks for visiting,
Kim

Project Recipe:

To see and order any items used in today's project, just click on the items below to see them in my Online Store. You can order from me if you live anywhere in Australia. I would love to be your Demonstrator if you don't already have one. Please allow "Demonstrator contact" in your preferences so I can thank you properly when you place your order.

Product List
Linen Thread
$8.75
Big Shot
$159.00