Showing posts with label Colour. Show all posts

Friday, July 5, 2024

Just Add Ink #709 Colour


Hello there,
time for a new challenge at Just Add Ink. This week's it's a colour challenge from Rochelle. You will have a wealth of choice this week, as you can choose to use ALL six colours or just pick three.


I decided to go with three of the colours - Highland Heather, Gorgeous Grape and Misty Moonlight. Here's how it turned out.


This was the first time I have used the Layers of Beauty Decorative Masks and I'm pretty impressed with the outcome. To colour the flowers my first layer was a light layer of Highland Heather. the second layer was a heavier application of Highland Heather and the third and final layer was Gorgeous Grape. The leaves were all Misty Moonlight, first a light layer then a more saturated layer.

The Just Add Ink DT have lots of beautiful projects using the colours to show you so please go check them and then come back and join in the challenge.

Thanks for visiting,
Kim

Recipe: All SU! unless otherwise noted
Stamps: Layers of Beauty, Beach Day
Dies: Layers of Beauty, Seasonal Layers (R), Stitched Rectangles (R)
Cardstock: Basic White, Thick Basic White, Basic Black
Ink: Highland Heather, Gorgeous Grape, Misty Moonlight, Versamark
Accessories: Layers of Beauty Decorative Masks, Blending Brushes, Distressed 3D Tile embossing folder, White embossing powder, Heat tool, Die cutting machine, Wink of Stella, Metallic sequins (R), Fine Tip glue, Dimensionals, Tear and Tape

Friday, February 16, 2024

Just Add Ink #689 Colour


Hello, 
time for a new challenge from Just Add Ink. This week Rochelle has given us a colour challenge. 


My inspiration was a mental process of - 'let's use some new product and I haven't done any colouring for a while or used a mask'. I mixed that all altogether with the colours and this was the outcome.


The most time consuming element was the colouring. I actually think colouring small detailed images takes longer than colouring larger ones. But it was a good occupation for a quiet weekend afternoon. Stenciling the background was very quick but I decided to add some interest by breaking that up into a striped pattern so that was a bit fussy as well.

The late afternoon photography unfortunately doesn't really do it justice. IRL it is very clean, bright and fresh, with a pop of colour from the flowers and sequins gleaming.

The Just Add Ink DT have lots of lovely projects to show you so please go check them and then come back and join in the challenge.

Thanks for visiting,
Kim


Recipe: All SU! unless otherwise noted
Stamps: Lifetime of Love, Framed Florets (R)
Dies: Lifetime of Love, Everyday Details, Stitched Rectangles (R) 
Cardstock: Basic White, Tahitian Tide, Vellum 
Ink: Tahitian Tide, Tuxedo Black (Memento)
Accessories: Artistic Mix Decorative masks, White emboss powder, Heat Tool, Gorgeous Grape blends, Pastel Adhesive Backed Sequins, White baker's twine, Multipurpose Glue, Die cutting machine, Wink of Stella, Dimensionals, Tear and Tape

Friday, December 22, 2023

Just Add Ink #684 Colour


Hello there,
well with Christmas almost upon us. We have one more challenge for you this week at Just Add Ink. Rochelle has asked us all to add traditional Christmas colours.


I make a gift card holder for each of the nieces and nephews each year for Christmas. This week was the perfect challenge to make them. They are always same, same but different, so each one gets something just a little bit individualised. Here's how they turned out this year. 


The holders were very simple, a strip of card stock, scored twice. One side folded over and adhered just on the edges to make a pocket for the gift card, then the remaining side folds to close it. To keep them closed I made belly bands embellished with shiny sprigs, snowflakes and ribbon.

The Just Add Ink DT have a some gorgeous projects to show you, so please go check them out, and then share yours! Thanks so much for joining us this year we love seeing all the projects you share with us! 

This challenge will run for two weeks, so you can also share your projects after Christmas when you have more time. It will close on January 3rd. There will be no winner's post for this challenge just the opportunity to share your work and inspire others.

The Just Add Ink team will be back next year with our annual blog hop on January 19, 2024. Till then wishing you all a very Merry Christmas and a Happy New Year.

Thanks for visiting,
Kim

Recipe: All SU! unless otherwise noted
Stamps: Many, mostly retired.
Dies: Stitched Shapes (R) and a whole lot of other retired dies.
Cardstock: Basic White, Real Red, Old Olive
Ink: Versamark
Accessories: DSP (R), Gold foil, Gold shimmer paper, Gold embossing powder, Heat Tool, Ribbon (R), Dimensionals, Tear and tape, Die cutting machine

Friday, March 17, 2023

Just Add Ink #644 Colour


Hi there,
this week at Just Add Ink, Kerry has a colour challenge for us all. It's a bold and vibrant combo to play with. My first thought was flowers, as always, but then decided to take a different path mixing old with new. Here's the colour combo.


And this is how my project turned out. 


Cactus Cuties, bought during COVID times and never used, came to mind when I pulled out my new Desert Details set. The two meshed together perfectly! Two elements that I think were critical for this project are the black accents, they make the bold colours pop even more and the little flower accents.

I'm really looking forward to seeing what you all make of this colour combination, but to get you started go check out the rest of the JAI DT projects for inspiration.

Thanks for visiting,
Kim

Recipe: All SU! unless otherwise noted
Stamps: Desert Details, Cactus Cuties (R)
Dies: Desert Detail dies
Cardstock: Thick Basic White, Basic White, Basic Black, Mango Melody, Gorgeous Grape
Ink: Versamark, Mango Melody, Granny Apple Green, Gorgeous Grape
Accessories: White emboss powder, Heat Tool, Blending brush, Flower punch (R), Iridescent pearl basic jewel, Black baker's twine, Dimensionals, Tear and Tape


Friday, December 9, 2022

Just Add Ink #633 Colour


Hello there,
another week closer to Christmas and another Christmas card coming your way - that's probably not a surprise. This week at Just Add Ink we have a colour challenge for you, suggested by me ;) Your can use it for a Christmas project as I have, or for whatever purpose that works for you. Here are the colours.


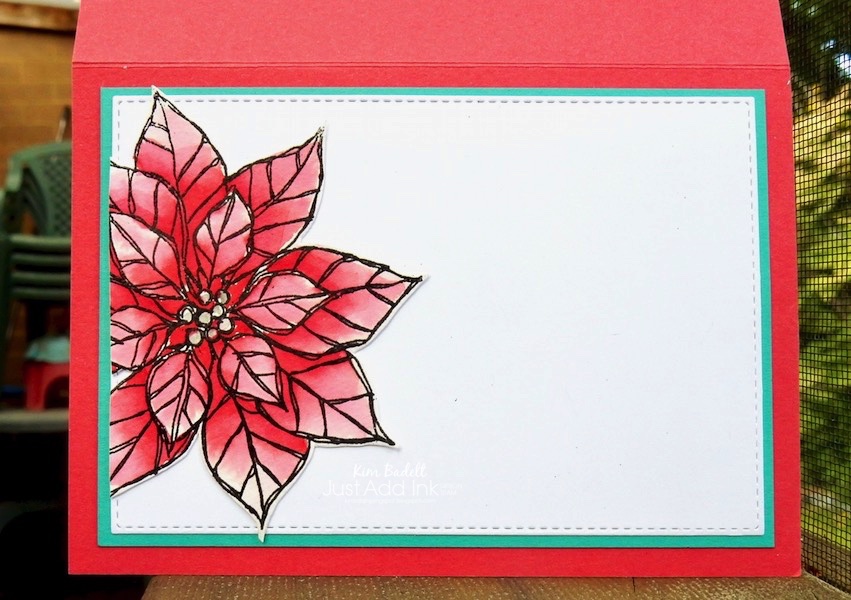
And this is what I came up with.


This was pretty much all about the watercolouring. I black heat embossed the large poinsettia twice, so that I could cut out the central ring of petals and mount them up on top of the base layer. I used several layers of colour to build up the colour and once dry added little silver pearls to the centre. A simple watercolored background splattered with white gouache, and sentiment finished off the front. For the inside I added one more watercolored poinsietta.

It's only getting busier at this time of year so something simple was definitely the way to go this week.

The JAI design team have lots of lovely projects to inspire you so please go check them out and then come back and join in the challenge.

Thanks for visiting,

Kim

Recipe: All SU! unless otherwise noted
Stamps: Joyful Christmas (R)
Dies: Stitched Rectangles
Cardstock: Basic White, Sweet Sorbet, Bermuda Bay, Basic Gray
Ink: Sweet Sorbet, Bermuda Bay, Basic Gray, Versamark
Accessories: Black, and White embossing powder, Heat Tool, Red and Green adhesive backed pearls, Watercolor paper, Aquapainter, White gouache, Dimensionals, Tear and Tape, Big Shot die cutting machine (R). 


Friday, September 30, 2022

Just Add Ink #623 Colour


Hello there,
time for a new Just Add Ink challenge, and this week Di has a colour challenge for us. It's bright, bold and perfect for Christmas so that's the theme I went with. Here are the colours.


I decided to pull out watercolour paper for this project, this is how it turned out.


This was fun to do and definitely not perfect as I had colour leak across boundaries in some of the fine detail areas, but I figure that is forgivable and adds to the arty homemade feel. To add Christmas sparkle I silver embossed the bauble, added a silver foil bow, silver sequins and splashes of Wink of Stella. If I had added a bauble to the inside there would have been no room for a Christmas message so I just added a little watercolored Christmas tree instead. I really loved how bright and intense the colours came out in this project!

The Just Add Ink team have plenty of colour filled projects to share with you so please go check them out and then join in the challenge.

Thanks for visiting,
Kim

Recipe: All SU! unless otherwise noted
Stamps: Bright Baubles (R)
Dies: Stitched Rectangle, Tree Lot dies, Christmas Banner dies, Pretty Pines dies (R), Delicate Baubles dies (R)
Cardstock: Thick Basic White, Basic White, Sweet Sorbet, Starry Sky, Parakeet Party, Watercolor, Silver foil
Ink: Versamark, Sweet Sorbet, Starry Sky, Parakeet Party
Accessories: Sequins (R), Silver embossing powder, Heat Tool, Wink of Stella, Dimensionals, Tear and Tape, Fine tip glue


Friday, November 12, 2021

Just Add Ink #580 Colour


Hello there,

I feel like I'm on a rapid trajectory to Christmas and the end of the year, in some ways that's good and in others it is panic inducing! This week I'm adding another Christmas card to my stash, using the new challenge from Just Add Ink. This week Rochelle is asking us to Just Add a Colour Combo. Here are the colours to work.

And this is what I came up with.


I rifled through my die stash and found an old Christmas sentiment die that would be perfect as a gold focal element. So I cut one out in gold and then another three in white card stock, glueing them together to give a nice dimensional shiny sentiment focal. I surrounded that with some soft pink poinsettia's and wintery foliage. I wanted the gold sentiment and the foliage elements to pop so I kept the background white just adding some timber texture. 

The Just Add Ink DT have lots of fabulous projects to show you so please go check them out and then come back and join in the challenge. 

Thanks for visiting,

Kim

Recipe: All SU! unless otherwise noted
Stamps: Christmas Season, Bells and Boughs (PaperTrey Ink)
Dies: Seasonal Labels, Text Block: Christmas die (PaperTrey Ink)
Cardstock: Thick Basic White, Basic White, Brushed metallic foil
Ink: Evening Evergreen, Blushing Bride
Accessories: Timber 3D embossing folder, Metallic sequins (R), Wink of Stella, Fine Tip glue, Multipurpose glue, Dimensionals, Tear and Tape

Friday, August 21, 2020

Just Add Ink #519 Colour


Hello there,
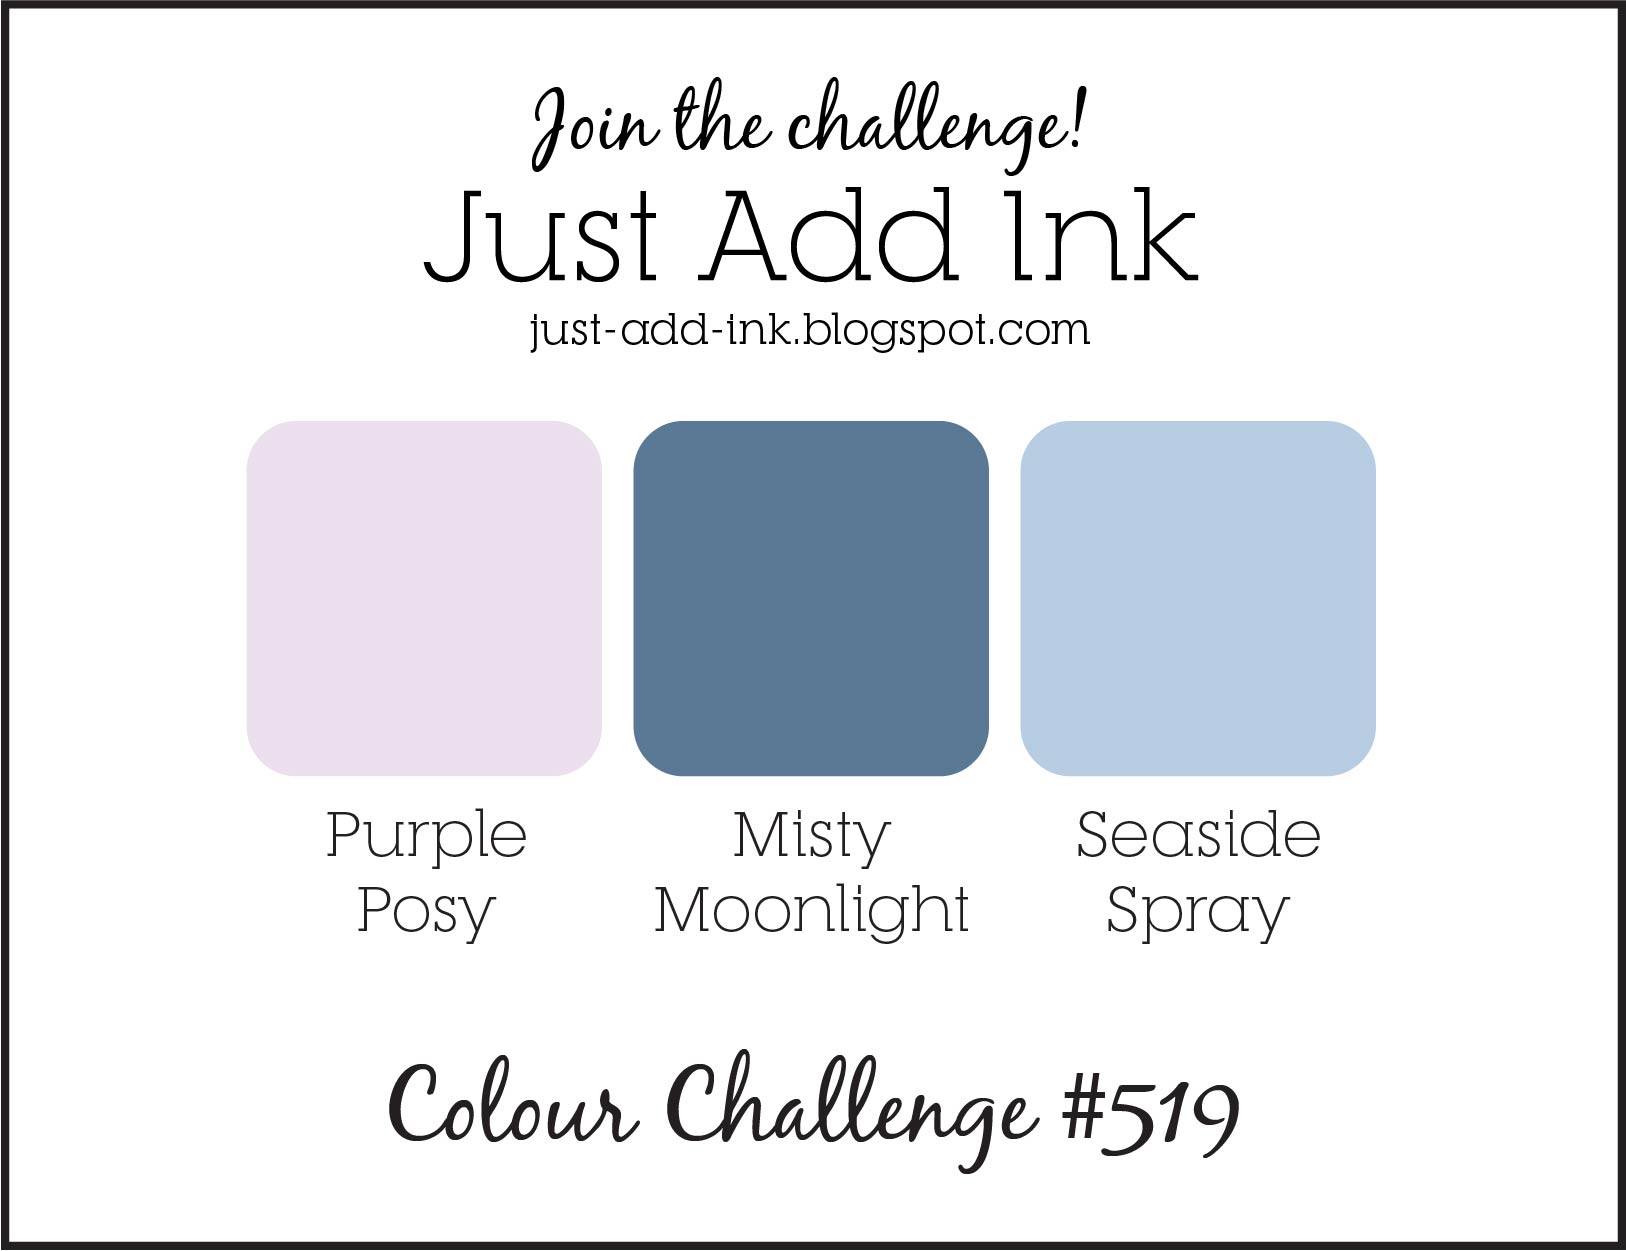
this week at Just Add Ink Jo is asking us to Just Add a Colour Combo, and it was certainly a favourite of mine! I used it to make my first official Christmas card of the year. Here are the colours. 


This is what I came up with a fun wintery scene. Perfectly timed as we have snow forecast for this weekend and I just couldn't pass up the chance to use my ice skating polar bear!


I watercolored a gradient background on watercolour paper, ensuring I knew where I wanted to place my mountain and hill elements so you would still see the change in colour above and below. I set that aside to dry and coloured in my polar bear using SU! Blends (alcohol markers). No die for this so trimmed him out, die cut my mountains and hill (embossing them to add texture). Before adhering my mountains onto the watercolour base I white heat embossed snowflakes. Finishing sparkly touches were a wink of Stella to my polar bear and an edging of shimmery crystal effects for my mountain and hill elements. Then I just had to add my sentiment and I was done!

I just love this mix of purple and blue, and thought it was perfect for this.

The Just Add Ink DT have lots of beautiful projects to show you so please go check them out and then come back and join in the challenge.

Thanks for visiting,
Kim


Project Recipe:
To see and order any items used in today's project, just click on the items below to see them in my Online Store. You can order from me if you live anywhere in Australia. I would love to be your Demonstrator if you don't already have one. Please allow "Demonstrator contact" in your preferences so I can thank you properly when you place your order.


Retired SU!: Bigshot die cutting machine