Monday, December 31, 2012

2012 unblogged wedding cards Day 1

Hello there,
well Christmas kind of hit me at light speed and I never made it back here (I did make it to the beach however :). So rather than wishing you all a Merry Christmas I'd like to send you my best wishes for 2013.

I decided the way I wanted to end 2012 and begin 2013 was to try and get some of my unblogged work blogged ;). To start off with I have three wedding cards - all commissions. My first commissions in fact - which was wonderful and a bit scary too. If all goes to plan I will add some sympathy cards, a stack of masculine cards and a few other special cards in the weeks to come. So please drop in to have a look. I'll keep the chatter to a minimum, and my recipes will be a bit of guesswork but I hope you enjoy my peek back to 2012.

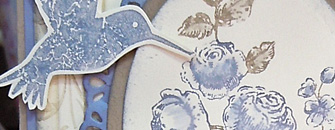
Here we go - wedding card 1 made for a beach wedding in Fiji I think it was.


Recipe: My best guess
Stamps: Stampin Up! (Loving thoughts) Papertrey Ink(On the farm, Beautiful Butterflies, Background basics Text Style)
Cardstock: Whisper White, Pool Party
Ink: Pool Party, Not Quite Navy, Real Red, Crumb Cake
Accessories: Real Red 1 1/4 " striped grosgrain,  Linen and Canvas Impression plate (PTI), Double ended banner die (PTI), mini sliver brads

Friday, December 14, 2012

JAI 148 Just add Christmas

Hello there,
welcome everyone for the last Just Add Ink challenge of the year. We are wrapping up a fabulous year with a very Christmassy challenge - we want you to Just Add Christmas. So pull out your Christmas projects, I'm sure you are working on some ;) I have bits and pieces scattered all over/under/around my crafting space. However the one I'm going to show you today I made to take to the Sydney SU! Heartfelt event back in November. A mini ornament Merry banner (double sided so you can pick your colour to match your Christmas decor). First the blue side.
 The red side
 Used the tag die to create a place to tuck the project recipe into.
A close up
A couple of construction shots. That little bit of tape was used to reinforce the most fragile fold.
 The same blanks now stamped up with the matching ornament.
The idea for this came to me when I was out walking one morning. So I just had to try and fold the cardstock and see if I could cut an ornament chain - and it worked! It was possible to cut 5 layers - just. I had to do just a little fine snipping in some spots where it had heavily embossed rather than cut all the way through. I was pretty pleased with how it came out and even more so once I had added the stamping step. Once that was done - it was time to embellish and for Christmas I couldn't go past adding some bling. Silver glimmer mats for the blue side and champagne for the red side. Of course I had to add my letters, fussy cut using the Broadsheet alphabet.

Some quick construction notes: The doubled sidedness served two purposes - one so you can select the side to suit your Christmas colours ;) but also a more practical one of making it quite sturdy. I adhered the two sides using dimensionals, securing the twine in there at the same time. The twine was used to tie each ornament to the ribbon (red and blue stuck together with doubled sided tape). The twine from each differently coloured pair of ornaments was tied together in a bow over the grosgrain ribbon, and the ribbons tied at either end of the banner. I added my project recipe using the two tag die cut and tied that on with more twine.

Thanks for visiting and if you can join us for our 2012 finale. However don't forget to join us again in 2013, well rested I hope, for our first challenge on Friday January 18th!
Kim

Recipe: All SU! unless otherwise noted
Stamps: Broadsheet alphabet, Ornament Keepsakes, Perfect Punches, Tiny Tags
Cardstock: Very Vanilla, Night of Navy, Silver glimmer, Champagne glimmer
Ink: Real Red, Cherry Cobler, Bashful Blue, Night of Navy
Accessories: Holiday Ornament framelits, 1 1/4" scallop circle punch, 1" circle punch, Scallop Trim border punch, Jewelery Tag punch, Two Tags BigZ die, Candlelight Christmas specialty DSP, Real Red and Night of Navy stitched grosgrain ribbon, Cherry Cobler and Island Indigo twine,  Doubled sided tape (XPress), Dimensionals

Friday, December 7, 2012

JAI 147 Just add balloons


Hello there,
how are you all going with your pre Christmas preparations?I still have a loonnngggg way to go. Not to mention ALOT of Christmas cards to make and then write (yikes!!) I am feeling Christmassy though (despite our recent toasty temperatures). Seeing the kids so excited about getting a Christmas tree up probably has something to do with that ;) OK on to this weeks Just Add Ink challenge which is to Just add balloons - sounds like fun :) Here's what I came up with.

My nephew had a birthday recently and I wanted something fun for him.  I think balloons are always entrancing to watch but how much more fun when they are shaped ones! It was thinking of bright yellow diggers that inspired the colours of my balloons for this card.  To provide a sky background for my balloons I started with a Bashful Blue mat then added an embossed white layer that you get to see peeping through die cut clouds spaces cut in the top Marina Mist layer. I added a subtle embossed pattern to the Marina layer and an embossed sentiment on a cloud to finish the front off. The inside was finished off to match. I'm delighted to say that my nephew loved it :)

Do check out the rest of the DT for some fun balloon ideas. Thanks for visiting,
Kim

Recipe: All SU! unless otherwise noted
Stamps: Little Hot Rod, Everyday Button Bits (PaperTrey Ink), Up Up and Away (SU!)
Cardstock: Bashful Blue, Marina Mist, Whisper White
Ink: Daffodil Delight, Chocolate Chip, Versamark
Accessories: Little Hot Rod dies, Cloud dies, Linen and Canvas Impression plate (Papertrey Ink), Rellie Rave embossing folder (Cuttlebug), Scallop border punch, Mini brad silver, Dimensionals, SNAIL adhesive, Double sided tape (X Press)

Friday, November 30, 2012

JAI 146 Just add a colour combo

Hello there,
well I've been busy with prepping for my final class of the year this week but I did squeeze in the time to put together my offering for this weeks Just Add Ink challenge. We have a lovely soft colour combo for you this week, while I haven't used it for a Christmas card I reckon it would make a lovely vintage flavoured card. So here is the colour pick.


 I used the colours to finally (only took nearly 2 months!), play with a vintage flavoured set (Papaya Collage) that grabbed my attention when the SU! catalogue was released in September. I just love that ornate frame so it had to make an appearance ;)

I tried to add a fair bit of dimension to this one, which might make it a bit tricky to post, but I'll face that challenge when it comes ;) I wanted the frame raised up, so I stamped it twice, once on the base then on some scrap. The scrap one I embossed, and then trimmed out and mounted up on dimensionals above the original stamped one. The bird and a spray of Pool Party foliage are also up on dimensionals. A cluster of pink flowers finishes off the scene. I used a litte banner to add the sentiment up the top. To add a little extra texture I also used the spritzer tool on the base and added some border detail taken from the Framed Tulip embossing folder.

Don't forget to check out the inspiration from the rest of the DT. Hope you get the chance to join us.

Thanks for visiting,
Kim

Recipe: All SU! unless otherwise noted
Stamps: Papaya Collage
Cardstock: Confetti White (R), Chocolate Chip
Ink: Crumb Cake, Chocolate Chip, Pool Party, Pretty in Pink
Accessories: Framed Tulips embossing folder, Subtles Pattern stack, Chocolate embossing powder (Zing), Itty Bitty shapes punch, 3/4" circle punch, spritzer tool, Jewels - pearls, Doubled sided tape (X Press), Dimensionals, Tombow

Friday, November 23, 2012

JAI 145 Just add a sketch


Hello there,
welcome back for a new Just Add Ink challenge. This week we have a great sketch for you to try your hand at. I know I'm madly working on projects with a due date of Christmas or before so perhaps you can use this for one of your projects! Don't forget to check out the rest of the DT too - they have some awesome ideas for the sketch to get you going :)
 
I wanted to create a light, bright and very girly birthday card for a dear friend from the JAI DT who has been having a rough time lately. I've often ooohhed and ahhed when another of the DT (Jodene) pulls out a lovely combo of green and pink so I thought I would give it a run.
 
 
This was a real mix of old and new. The DSP has to be some of the first I ever bought from SU! - its single sided!! But most of the rest I still class as brand new and I am in play mode. I stamped my medallions in versamark and embossed in white. Then using the matching framelits cut out the flower layers. To give the flower more dimensional I sponged over the edges with Regal Rose ink and carefully curled the petals a little. I also cut some leaves, trimmed from one of the larger floral framelit diecuts, and sponged their edges. I topped the flower with a vintage button threaded with twine. I finished off the twine ends with rhinestones, two stuck together with the end of the twine in between, putting to use a nifty idea Teresa Dabrowski presented at the last South Pacific convention. All the rest is straightforward stamping, stitching and a scatter of rhinestones.
 
Its always a bit of fun to put together something that is very girly girl :)
Thanks for visiting,
Kim
 
Recipe: All SU! unless otherwise noted
Stamps: Everything Eleanor, Apothecary Art, Daydream Medallions
Cardstock:  Certainly Celery, Old Olive, Regal Rose, Whisper White
Ink: Regal Rose, Old Olive, Versamark
Accessories: Floral Frames Framelits, Finishing Touch Edgelits, Sarah DSP (R), Vintage faceted designer button, Pear Pizzazz pleated satin ribbon, White embossing powder, Lucky Limeade twine, Jewels - rhinestones, sewing machine, Double sided tape (X Press), SNAIL adhesive, sponge

Tuesday, November 20, 2012

Stampin' Up! Heartfelt Event Sydney

Hello there,

well its taken me a while to get organised but I wanted to show you a couple of my highlights from the recent Stampin' Up! Heartfelt event that was in Sydney. I realised as I looked through my photos that they were all of the crafty stuff, which is obviously important - of course - lol! But sadly forgot to take any of the lovely friends I had the pleasure of spending the day with. Di Barnes, Sam Post and Kellie Jupe.  Spending the day immersed in crafty goodness with these special friends was really the icing on the cake. Thanks guys!

It's hard to know where to start, but since my day started with attending Sophie's (from SU!) presentation I'll start there. Sophie shared some inspiring decorative items including a fabulous flower wreath (my photo was blurry) but I do have one of her altered foam balls. I'll never look at foam shapes the same way again ;)
Don't the hints of sparkle look fabulous! I definitely picked up some new ideas from all the wow presenters. Now I just need the time - isn't that always the way ;)
 
I really enjoyed the booth presentations - the demos presenting did a fantastic job and showcased some great ideas. Here is one of my absolute favs from Teresa Dabrowski.
I had never even considered buying the Lattice Bigz die before and I think Teresa has single handedly convinced me I need this. This glimmer ornament took my breathe away!
Here's another favourite from the lovely Linda Higgins.
 
I loved all different elements of sparkle in this gorgeous Window Sheet card that Linda demoed.
 
Now last but not least a fabulous banner created by my lovely friend Di Barnes. Di helped out at the Big Shot table in Product Playground and had some items up to show what you can do with the Big Shot. She did a fantastic job, as did all the other ladies working in the product playground. Need I say that the Snow Flurry die is also on my wish list now ;)
 
Well I hope you enjoyed that pitstop tour of my Heartfelt event highlights. I really enjoyed the day. It was fun, flexible, inspiring and I won't hesitate to go again next year :)
 
Thanks for visiting,
Kim

Friday, November 16, 2012

JAI 144 Just add music


Hello there,
goodness I can't tell you how good it feels to sit down and write this post. We spent four days of this last week without phone and internet  - and while at times that was somewhat liberating it also felt like a decent into the dark ages! But I'm back in time to let you know about this week's Just Add Ink challenge. This week we want you to Just Add Music. Lots of scope and fun to be had with this one!

Now at this time of year I'm finding my thoughts turning more and more to Christmas, and an integral part of my memories of Christmas, particularly as a child, are of the music - the Christmas carols to be exact. So I just had to design a Christmas card that included music.


Heavens knows why but after years, and I do mean years, of avoiding Always Artichoke I was seized by the desire to use it, and its muted tones seemed to suit the vintagey feel I thought music would add. So that was what determined the colour choice. To generate that vintage feel I sponged all the edges and roughed the base mat up a bit. I added texture by embossing the tag that was used to mat the ornament, rubbing some white craft ink over it to bring out the pattern. Then finished off the card with a few focal layers and some little snippets of seam binding and lace.  The inside was finished off to match. So, pretty simple but fun to make - and you will definitely get inky :) Do go check out the rest of the DT for some fabulous ideas on how you can add music this week!

Thanks for visiting,
Kim

Recipe: All SU! unless otherwise noted
Stamps: Ornament Keepsakes, More Merry Messages, Music Notes
Cardstock: Always Artichoke, Very Vanilla, Crumb Cake
Ink: Always Artichoke, Crumb Cake, Bashful Blue, Whisper White craft
Accessories: Two Tag BigZ, Lacy Brocade embossing folder, Holiday Ornaments Framelits, 1" circle punch, Double ended banner die (Papertrey Ink),  Jewels - pearls, Sponge, Double sided tape (X Press), Dimensionals


Friday, November 9, 2012

JAI 143 Just add a colour combo


Hello there,
well its the end of another busy week, which is good, as that means I'm on my way to the Stampin Up! regional Heartfelt event in Sydney - yippee! But before I head off for my little mini weekend away I wanted to let you know about this weeks Just Add Ink challenge. This week we have a colour challenge for you. Here are the colours.

The first thing these colours said to me was man card, although you most certainly can make a gorgeous girl card with them. Just check out the rest of the DT to see some awesome examples!


I started by picking out some of the bolder balloon patterns and stamping my balloons. Then I worked out where they were going to go and punched out my clouds (using circle punches - a nifty idea I picked up from Pinterest) from the overlay so you can see the embossed clouds below. Having cut a Marina panel originally as the overlay I changed my mind as I decided it was a bit bland and instead used Marina Mist ink and my brayer to create a graduation of colour. I finally worked out how to using my brayer and get that gradual change of colour with no streaks - delighted about that and with the end result. Given its a guy card I kept the embellishments simple - just a tiny bit of scalloped trim and linen thread to accent the sentiment (a last minute assembly addition!). This one goes into storage for my FIL birthday next year - wish I could say I was that prepared for some of my closer deadlines!!

Thanks for visiting,
Kim

Recipe: All SU! unless otherwise noted
Stamps: Up, Up and Away
Cardstock: Sahara Sand, Early Expresso, Whisper White, Marina Mist
Ink: Marina Mist, Early Expresso, Tangerine Tango
Accessories: Punches (1 1/4", 1" and 3/4" circles; dotted scallop ribbon border), Square Lattice embossing folder, Linen thread, Brayer, Dimensionals, Double sided tape (X Press)

Friday, November 2, 2012

JAI 142 Just add a sketch

 Hello there :)
anyone notice the weather getting warmer (or colder - depending on where you are of course)? Our garden was looking a bit like a lush jungle before DH spent the weekend doing some taming. I must admit I didn't help I was too busy doing some scrapbooking - yippee! But I did admire the result! Now did you have fun with that lovely colour combo last week? Well this week at Just Add Ink we have a sketch for you. Here it is.
 I needed to make a rather overdue baby card and as it happened I also hadn't inked up a new stamp which was just perfect for the job.


Hmm do you think it might be for a girl ;) 
I decided to go the classic soft pink and brown path and of course you can't go wrong with polka dots! As the background was busy I went simple with my ark image and embossed it. I added little embellishing bits and pieces - like the glossed and glittered heart and baby tag and that was it. This one is winging its way to the UK.

You'll be sure to find some awesome sketch inspiration checking out the rest of the Just Add Ink DT so don't forget to drop past their blogs! Thanks for visiting.
Kim

Recipe: All SU! unless otherwise noted
Stamps: Two by Two, Tiny Tags (Papertrey Ink)
Cardstock: Pink Pirouette, Chocolate Chip, Whisper White
Ink: Pink Pirouette, Chocolate Chip, Versamark
Accessories: Chocolate embossing powder (Zing), Happy Spots patterned paper (PTI), Pink Pirouette 1 1/4" grosgrain ribbon (R), Early Expresso twine, Cupcake builder, Owl builder, Small Heart, Scalloped border (punches), Double ended banner die (PTI), Pinking shears, SNAIL adhesive, Dimensionals, Double sided tape

Friday, October 26, 2012

JAI 141 Just add a colour combo

 Hello there,
well this week at Just Add Ink we have a colour challenge for you and it has a lovely soft feel just perfect for vintage girly stuff! Since I needed a birthday card for a friend it was well timed for me :) Here are the colours.
 And here is what I came up with - a mix of old and new!

Lots of layering of embossing and ink , it was fun to just play around and see how it turned out. Luckily for me it looked good ;) To soften the flowers, once I stamped them I just grabbed my aquapainter and lightly spread the ink from the stamped image. The rest is pretty straightforward, some sponging and lots of embellishing details to give that vintagey feel. It's fun to create a full on girly card sometimes :) Now that's not to say these colours have to vintage! Why don't you join us at Just Add Ink this week and see what you come up with.

Thanks for visiting,
Kim

Recipe: All SU! unless otherwise indicated
Stamps: Elements of Style, Tiny Tags
Cardstock: Very Vanilla, Crumb Cake, Winter Wisteria
Ink: Winter Wisteria, Crumb Cake
Accessories: Vintage Wallpaper embossing folder, Stripes embossing folder, Classic Oval nestabilities (Spellbinder), Finishing touch edgelets, Medium Jewelery Tag punch, Crumb Cake seam binding, Winter Wisteria twine, Dimensionals, Double sided tape (X Press)

Friday, October 19, 2012

JAI 140 Just add chevrons

Hello there,
well life is returning to its familar patterns here with the return to school and I'm hoping that means I will be able to return to my familiar patterns of stamping :) I did seize the chance before the chaos of the holidays to prepare something for this weeks Just Add Ink challenge which is - Just add chevrons. Sounds like fun doesn't it! Here is what I came up with in a late night change of mind brainstorm.

This was not what I originally had in mind, in fact my plan was to have used the thin border chevron die cuts. But as I cut them and then lined up my rainbow of colours (did you pick the rainbow sequence ?) I noticed the pattern of the negatives, and then my eye fell on my floral framelits - and so this card came about. With the idea there I just had to make it and so once I had my Mr 4 asleep I pulled out all my bit and pieces and got to work. I was a happy camper when it was done :) Tired but happy. Actually just looking at the colours makes me smile.

Hope you can have as much fun as me when you add chevrons this week! Don't forget to check out the awesome ideas that the rest of the JAI DT have come up with.

Thanks for visiting,
Kim

Recipe: SU! unless otherwise noted
Stamps: Daydream Medallions, Vintage Labels (R)
Cardstock: Daffodil Delight, Whisper White, Basic Black
Ink: Real Red, Daffodil Delight, Basic Black
Accessories: Floral Frames Framelits, 1 3/8" circle punch, Classic circle nestabilities (Spellbinder), Chevron border die (Papertrey Ink), Brights, Subtles, Regals pattern stacks, Brights buttons, Linen thread, Old Olive grosgrain ribbon (R), SNAIL adhesive, 2 way glue, Dimensionals, Tombow multi

Friday, October 12, 2012

JAI 139 Just add something brand new

Hello there,
well I've been enjoying a lovely week spent with family in Sydney this week, which has included a visit to the zoo, beach, and lots of playgrounds - of course :) However before I left I did manage to squeeze in some crafting with some of my new SU! products, and its the new bit that's key for this weeks Just Add Ink challenge which is Just Add something brand new! Now I'm sure you can manage that :) This is what I came up with.


So what did you think of the inside? - a bit of fun isn't. I've been saving up this die to use just for this card. A friend of mine said recently she's discovered that boys (big and small) want their cards to be interactive - so true!! and this card is my DH's birthday card so it had to have/ do something special. (I think he liked it). As for the new, well there's a bunch of stuff - the paper and ribbons banners are all brand new and I think I can count the HAPPY die as well. I also finally got to indulge in the banner trend - I had fun making those :) Aside from the banners the rest of the front was pretty simple - a little bit of embossed texture and then some doodling around the edge with a white gel pen. The inside was really a lot simpler than it looks - the fussiest bit was working out how to add the balloons.
 
So do you think you can have some fun with some new crafting goodies this week - please join us if you can :)
 
Thanks for visiting,
Kim
 
Recipe: All SU! unless otherwise noted
Stamps: Tiny Tags, Think Big Favorites 12 (PaperTrey Inc)
Cardstock: Island Indigo, Real Red, Crumb Cake, Baja Breeze, Whisper White
Ink: Real Red, Daffodil Delight, Island Indigo
Accessories: Summer Smooches DSP, Linen/Canvas Impression plate (PTI), Movers and Shakers: Poppers die collection (PTI), Tiny Tag die (PTI), Fishtail Flag STAX (My Favorite Things),White gel pen, Linen Thread, Daffodil Delight and Real Red 1/4" stitched grosgrain ribbon, Cherry Cobler twine, Silver brads, SNAIL adhesive, Double sided tape, Sticky strip

Friday, October 5, 2012

JAI 138 Just add a colour combo

Hello there,
I have to admit I suggested the colour combination for this weeks Just Add Ink challenge and then thought what on earth have I done!!! However having seen what the rest of the DT have come up with I'm glad I did! If you didn't like Summer Starfruit before you will after this challenge! In my case some new stamps to play with were inspiration enough to get the creative juices going ;) Here's the colour combo.

And here is what I came up with.

This card came together really quickly, which was delightful and rather surprising, especially when I had no idea how to do the box pleating! Basically I laid my DSP on the score board and just started scoring and folding and miraculously it worked - although I have managed to hide, by sheer chance rather than skill, a couple of boo boos! The swirl from Everything Eleanor is definitely a new favourite too!

Summer starfruit is still growing on me but I am glad this challenge made me take it for a test drive ;) Hope you can join us.
Thanks for visiting,
Kim

Recipe: All SU! unless otherwise noted
Stamps: Everything Eleanor, Occaisional Quotes (R), Background Basics: Houndstooth (PaperTrey Ink),
Cardstock: Basic Grey, Summer Starfruit, Whisper White
Ink: Summer Starfruit, Basic Grey
Accessories: Boho Blossoms punch, Summer Starfruit stitched satin ribbon, Urban Garden DSP (R), Jewels - rhinestones, Dimensionals, SNAIL adhesive, Double sided tape (X Press)

Friday, September 28, 2012

JAI 137 Just add a sketch

Hello there,
we had some fabulous and fun kids cards for the challenge last week at Just Add Ink. I think you're going to like what we have in store for you this week too, a wonderfully classic sketch. I was in full on Father's Day card making mode when this sketch came up so - yep you guessed it ;) today it's a Father's day card. The best thing was that my Dad was actually visiting when it was Father's Day which was really nice! Here's the sketch.

And here is what I came up with.

I literally pulled my Apothecary Accent die out of its delivery box to make this - sooo fun to play with new stuff! But it was worth waiting for as it was just perfect for this card and for that matter so was the "world's greatest" stamp. Ok granted I'm biased, but my Dad is the greatest - see perfect :) It's hard to go past a bit of rustic texture for masculine cards and that's definitely how this one came out. Texture from the lattice embossing mat, the woodgrain DSP, faux stitching (that was inspired by receiving a gorgeous card from a lovely friend - thanks Christine!!), vintage brads and a couple of banners to frame the "Dad" sentiments. In real life the inside did not have that dodgy grey spodging at the bottom I had to photoshop out what I wrote to my Dad and that was the best I could get :( Technology and I are still on a learning curve!
 
The DT have some wonderful inspiration for you so please go check them out and then go have fun with the sketch :)
 
Thanks for visiting,
Kim
 
Recipe: All SU! unless otherwise noted
Stamps: World's Greatest, Teeny Tiny Sentiments, Calender Alphabet and Numbers (R), Father's Day stamp from local craft shop
Cardstock: Garden Green, Early Expresso, Very Vanilla
Ink: Early Expresso, Garden Green
Accessories: Apothecary Accents Framelits, DSP (R), Labels 4 nestability (Spellbinder), Double ended banner die (PaperTrey Ink), Square lattice embossing folder, Colour spritzer tool, Vintage brads, Mat pack and piercing tool, Dimensionals, SNAIL adhesive, Double sided tape (X Press)